Event & Wedding Pros · Jul 16, 2026 · 11 min read
iPad Photo Booth Launch Workflow: Offers, Paperwork, and Event Screens
A practical post-download workflow for turning an iPad photo booth business kit into a consistent offer, client paperwork, flyer, event plan, and tested screen-and-overlay set before accepting the first booking.
Begin with a controlled master copy of the download
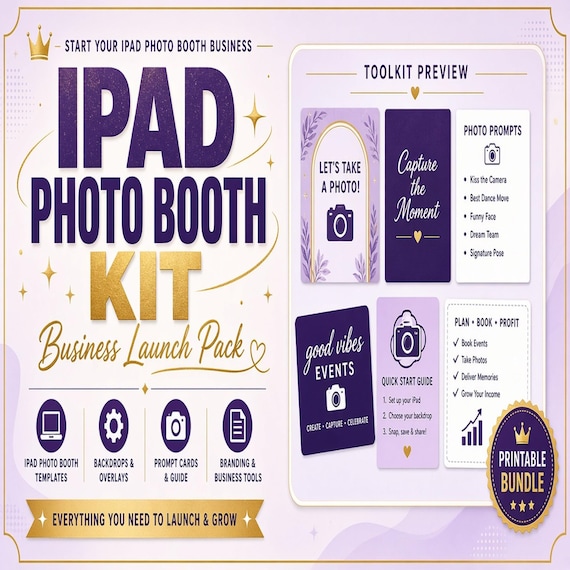
An iPad photo booth business kit is a collection of working materials, not a finished business system. The current launch-kit page describes editable flyers, client paperwork, pricing tools, overlays, start-screen-style assets, and event-planning pages. Start by comparing the downloaded folder with the current product page and any included instructions. That simple inventory keeps you from assuming that a particular format, page, or software feature is present when it is not.
Keep the original download unchanged. Make a separate working copy for your business, and create another dated folder for the first sample event. Open each file with the compatible application named in the current instructions, confirm that text and graphics display properly, and note which items need decisions before they can be edited. If a file does not open as expected, return to the listing details and included guidance instead of converting or rebuilding it blindly.
- Preserve the original download and its instructions in one read-only folder.
- Create a business master copy before changing names, colors, wording, or numbers.
- List every included item you can verify from the current product page and download.
- Do not promise a feature, format, or app connection until you have tested it yourself.
Define the service before editing any template
Templates become inconsistent when the flyer, price page, client form, and event screen are edited before the service itself is defined. Write a plain-language description of what a booking includes: the type of booth you operate, the event area you need, the planned operating window, what guests receive, what the client supplies, what you supply, and what happens before and after the event. Use only details that match your actual equipment, software, staffing, and capacity.
Then mark every undecided item. Common decisions include travel boundaries, setup and pack-down timing, venue access, power or connectivity needs, backdrop or prop expectations, branding choices, guest-delivery method, on-site contact, and overtime handling. These are planning prompts, not universal requirements. Your equipment maker, booth application, venue, insurer, and local rules remain the appropriate sources for technical and operational requirements.
- Write one accurate sentence that describes the service a client is booking.
- Separate included items from optional additions and client responsibilities.
- Record equipment, staffing, travel, access, and event-time limits you can actually support.
- Leave a decision unresolved rather than filling a template with an untested promise.
Build package boundaries that every page can repeat
A clean offer is easier to quote, advertise, and deliver. For each package you truly plan to sell, create a small source-of-truth table with the package name, event type, service time, setup allowance, travel treatment, included visual choices, guest-output or delivery details, optional additions, and the conditions that change the price. Avoid vague words such as unlimited, custom, premium, or full service unless the surrounding text explains exactly what they mean.
Do this work outside the flyer first. A package table makes conflicts obvious: the flyer may mention one duration while the client page mentions another, or a price card may imply an add-on is included when the event plan treats it as optional. Resolve those differences in the table, then copy the approved wording into the working templates. Recheck the table whenever equipment, travel boundaries, staffing, or delivery methods change.
- Give each package a distinct name and one-sentence scope.
- State what is included, what is optional, and what the client must confirm.
- Use the same duration, travel, delivery, and add-on wording across every document.
- Remove any package that cannot be delivered reliably with the current setup.
Use the pricing tool as a planning workspace, not a price promise
The current launch kit includes a pricing calculator, but a calculator is only as useful as the inputs you enter and review. Build a list of costs and time that actually belong to your service. Depending on your operation, that may include preparation, client communication, travel, setup, event coverage, pack-down, equipment wear, supplies, software, payment processing, insurance, subcontracted help, design time, and post-event delivery. Use the categories that apply and omit the ones that do not.
Run a few realistic examples before placing a number on a flyer. Test a nearby short event, a longer booking, an event requiring more travel or access time, and a booking with optional additions. Review the result for omitted costs, double counting, and assumptions that no longer match the business. The tool does not determine taxes, legal obligations, profitability, or the correct market price for you; obtain appropriate professional guidance where needed and approve every published number yourself.
- Enter real operating inputs rather than copying a competitor's public price.
- Test several booking scenarios, including travel, overtime, and optional additions when relevant.
- Check that every public price matches the corresponding package scope.
- Review taxes, fees, insurance, and legal or accounting questions with qualified local help.
Adapt contract-style paperwork to the real client journey
Contract-style pages should reflect the service you can deliver and the decisions a client is actually making. Read every line before adding a business name or sending the document. Check that names, dates, payment milestones, cancellation language, venue access, setup timing, equipment boundaries, client responsibilities, damage concerns, image permissions, delivery expectations, and change procedures are relevant and internally consistent. Delete placeholders and sections that do not apply rather than leaving them for the client to interpret.
A downloadable template is not a substitute for legal advice, and changing a logo does not make generic language suitable for every location or business. Have the working document reviewed for the jurisdictions and events you serve. Keep a clear version date, and do not edit terms silently after a client has agreed to them. If a booking changes, record the approved change in the manner your reviewed process requires and make sure the event plan reflects the same update.
- Replace every placeholder and verify every date, amount, name, and contact field.
- Remove clauses that do not match the actual service instead of relying on generic wording.
- Obtain appropriate local review before using contract-style material with clients.
- Keep the accepted version and later approved changes together with the booking record.
Turn inquiry details into one event handoff
The event plan should collect only the details needed to quote, prepare, operate, and follow up. Start with the client and venue contacts, event date and service window, address, access instructions, setup location, power or connectivity information relevant to your tested equipment, guest expectations, visual preferences, delivery choice, and decision deadlines. Mark which fields are supplied by the client, which are confirmed by the venue, and which are completed by the operator.
Do not scatter the same fact across unrelated email threads and files without deciding which copy controls the event. Use one booking identifier and one current handoff page. When a detail changes, update that page and note the confirmation. Sensitive personal, venue, or payment information should be collected only when necessary, stored with appropriate safeguards, and retained according to the business's reviewed practices. A template organizes information; it does not provide secure storage by itself.
- Assign one booking name or identifier to the quote, paperwork, event plan, and asset folder.
- Separate requested details from confirmed details and record who confirmed each one.
- Give the event team one current handoff page rather than several competing versions.
- Minimize sensitive information and use storage practices appropriate to the data collected.
Edit the flyer only after the offer is approved
A flyer is the public summary of decisions already made; it should not be the place where packages are invented. Begin with the approved package table and select only the details a potential client needs for the next step: the service type, suitable event categories, clearly stated package starting point or call to action, genuine included features, service area when relevant, and a working inquiry method. Keep important limitations close to the claim they qualify.
Test the flyer at the size and in the channel where it will be used. Check names, contact details, links, codes, dates, legibility, contrast, image permissions, and whether the wording remains accurate when viewed without a long caption. Ask someone unfamiliar with the offer to explain what they think is included and how they would inquire. If their answer differs from the package table, revise the flyer rather than relying on a later conversation to correct it.
- Copy approved package wording instead of creating a second version of the offer.
- Verify every contact method, link, code, date, and price before distribution.
- Check readability at the actual display or screen size.
- Remove decorative claims that could be mistaken for included equipment or service.
Test start screens and overlays in the actual booth setup
Start screens and overlays are visible parts of the guest experience, but a preview image does not prove that an asset will fit every device, booth application, orientation, camera view, or output method. Follow the current instructions for the download and the current documentation for the application and equipment you use. Work from copies, preserve the intended dimensions and file properties unless the instructions say otherwise, and test the asset in the exact workflow planned for the event.
Run through the guest path from the normal viewing distance. Check whether buttons or prompts remain clear, names and dates are correct, important artwork stays away from cropped areas, the camera view is not obstructed, and the overlay leaves faces and requested details readable. Export a sample through the real delivery or output path and inspect the result on more than one screen when practical. If the asset fails, return to a clean working copy and diagnose one change at a time.
- Confirm compatibility with the current booth application and device before promising a design.
- Use the real orientation, capture flow, and output or delivery method during testing.
- Check cropping, readability, color, names, dates, and camera clearance on a finished sample.
- Keep an approved export separate from editable working files.
Add a clear asset-approval checkpoint
Visual preferences can change late because several people are involved in an event. Prevent uncertainty by setting a specific checkpoint for the client to review the items they are expected to approve, such as the event name, date, spelling, colors, logo use, start-screen wording, or overlay preview. State what the preview represents and what remains outside the preview, including differences caused by devices, screens, printers, lighting, or other equipment when relevant.
Record approval in the booking file and connect it to a clearly named version. If the client requests a change, duplicate the working file, revise it, and issue a new preview rather than overwriting the approved copy. Also set a reasonable cutoff for changes based on your real preparation process. The goal is not to make the form longer; it is to ensure the event team can identify the exact assets that were reviewed and tested.
- List the names, dates, colors, logos, wording, and visuals the client must verify.
- Attach approval to a version name rather than an unlabeled file.
- Preserve the approved copy when creating a revision.
- Repeat the compatibility test after any change that affects size, placement, or export.
Rehearse one booking from inquiry through pack-down
Before accepting the first paid event, create a sample client and sample event that exercise the entire workflow. Send the inquiry reply to yourself, prepare a quote from the approved package table, review the client paperwork, complete the event handoff, customize one screen and overlay, capture an approval, and prepare the final event folder. Then set up the actual equipment and run several guest attempts under realistic conditions.
Include imperfect scenarios: an unclear venue instruction, a misspelled name caught during approval, a guest who pauses or restarts, a connection issue if connectivity is part of the setup, and an event contact who needs a quick answer. Finish by packing down, saving the intended outputs, and recording what took longer than expected. Revise the workflow where the problem occurred. A successful rehearsal should leave the next operator able to identify the current offer, paperwork, event facts, approved assets, and fallback steps without guessing.
- Use a sample booking rather than a real client's personal information.
- Test the full document and asset path, not only the booth screen.
- Run realistic exceptions and record who makes each event-day decision.
- Update the source-of-truth pages before treating the workflow as ready.
Use version names that survive the second event
A folder that works once can become confusing as soon as a second client has a similar date, venue, or color request. Use a consistent naming pattern that includes a booking identifier, document or asset type, version, and status. Keep business master files apart from client copies, and keep editable working items apart from approved exports. Avoid names such as final, final-new, or use-this-one when a date and version number can make the choice explicit.
Archive the completed booking according to your reviewed retention and privacy practices, then return to the business master for the next event. Do not turn the previous client's folder into a new template without removing their information and assets. Keep the download's source files and license note with the original purchase, and follow the current license. The current product description permits use for one photo booth business and does not permit reselling, sharing, or redistributing the template files themselves.
- Separate original download, business master, active booking, approved exports, and archive folders.
- Include a booking identifier, item type, version, and approval status in file names.
- Start each event from a clean master rather than another client's folder.
- Keep source templates private and follow the current one-business license terms.
Run a first-booking readiness check
The kit is ready for use when the offer can be explained consistently, the pricing inputs have been reviewed, public claims match the approved package table, contract-style paperwork has received appropriate review, the event handoff has clear owners, and the chosen screens and overlays have passed a test in the actual setup. The team should also know where the current versions live and what to do when a detail changes. A long folder of templates without those connections is not yet an operating workflow.
Pause when the equipment or application has not been tested, file compatibility remains uncertain, package terms conflict, local review is incomplete, or a public flyer promises something the event plan cannot support. Choose a narrower product instead when the only need is a reply set, a pricing tool, or visual assets; choose the broader business kit only when its coordinated offer, paperwork, promotion, planning, and screen materials solve current gaps. Inspect the current product pages before checkout because contents, compatibility details, and terms can change.
- Ready: one consistent offer appears across pricing, flyer, paperwork, and event handoff.
- Ready: approved visual assets work in a complete test on the actual setup.
- Pause: terms, compatibility, responsibilities, or local review are still unresolved.
- Choose by the current operational gap, not by the number of templates in a bundle.
Printables used in this guide
Instant downloads from the SteadyStackStudio Etsy shop.
iPad Photo Booth Business Launch Kit
Build a cleaner photo booth launch kit with editable flyers, client paperwork, pricing tools, overlays and start-screen style…
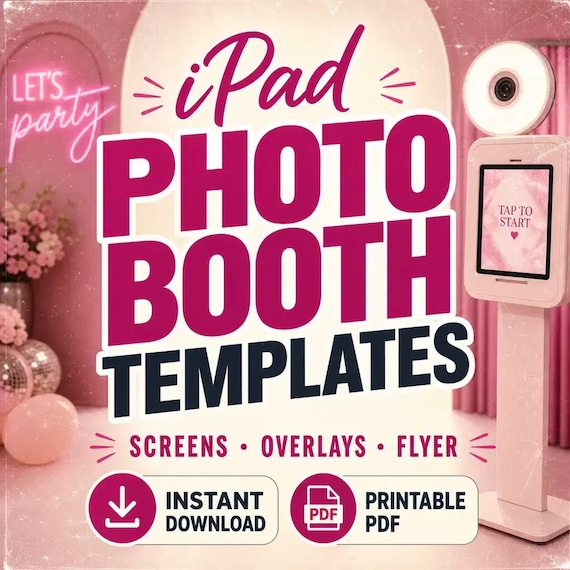
iPad Photo Booth Templates
A downloadable iPad photo booth template bundle with start screens, overlay assets, flyer designs, contract-style forms and…
Photo Booth Business Kit
A premium photo booth business kit for organizing your offer, pricing, client documents and event-ready visual templates without…
360 Photo Booth Business Kit
Launch or clean up a 360 photo booth rental business with a practical digital kit: contract-style paperwork, pricing calculator…