Event & Wedding Pros · Sep 4, 2026 · 18 min read
DTF and UV Print Shop Upload Setup: Write Customer File Rules, Check Artwork, and Track Issues
A practical setup plan for DTF, UV DTF, sticker, and small custom print shops that need customer upload instructions, file-prep checks, and a simple way to track order issues without rewriting the same message all day.
Confirm what the current download includes
Begin with the files the current listing actually describes. The SteadyStackStudio DTF and UV print shop upload instructions kit is a premium digital template kit for DTF, UV DTF, sticker, decal, and small custom print shops that receive customer artwork. The listed contents are an Excel customer file issue tracker, printable upload instruction sheets in PDF, editable customer instruction cards in PPTX, a quick-start PDF, and a README/license note. It is an instant digital download. No printer, heat press, film, powder, tumblers, or other physical item ships.
Open the quick-start PDF first, then keep the original ZIP and one untouched copy. Compare the listed pieces with the job you need: a customer-facing way to explain how to send artwork, a card or sign you can place at the counter or in a pickup email, and a workbook for notes, status, and follow-ups when a file is wrong. If you need a RIP program, a Shopify upload portal, automatic preflight software, a gang-sheet builder, or a promise that the files will match one press brand or one online builder, stop there. Those tools are outside this kit.
The listing is explicit about scope. The pages are general customer communication tools. They are not print-quality guarantees, platform-specific technical support, or legal, tax, medical, safety, licensing, or compliance advice. You remain responsible for the file rules you publish, the jobs you accept, and the reprints you approve. Use the files for your own shop workflow as the listing describes. Do not treat the download as a product you can resell, share, or upload as your own competing pack.
- Verify that the ZIP matches the listed Excel tracker, PDF instruction sheets, PPTX cards, quick-start PDF, and README.
- Read the quick-start notes before you rewrite every customer message.
- Keep an untouched master copy and make a separate working copy.
- Treat the kit as communication and tracking pages, not as a press, RIP, or file-repair service.
Decide whether a print shop actually needs this kit
This kit fits a shop that already takes custom artwork and is tired of the same conversation. A customer sends a screenshot from a phone. Another sends a JPEG with a white box around a logo. A third asks why the tumbler wrap looks soft after they enlarged a social-media image. You answer in email, then again in texts, then again at the counter. The press is ready. The file is not. The missing piece is not another decorative mockup. It is a written intake path that a stranger could follow without a call.
It also fits a shop that does more than one process. DTF for garments, UV DTF for hard surfaces, stickers, and decals often share a front counter and a shared inbox. If the same person accepts a shirt logo and a cup wrap with one vague “send the file” message, the wrong substrate rules get applied. A short instruction sheet per process, plus one tracker row per order, keeps those jobs from mixing. The workbook is for notes, status, and follow-ups. It is not an accounting system, a production calendar, or a customer portal.
Skip this kit, or use it only as a draft, if your shop already has a working upload portal that rejects bad files, a written spec sheet customers actually use, and a ticket system that already ties each file to an order. Skip it if you do not take customer artwork at all, or if you only sell ready-made transfers with no custom files. Skip it if you need legal contract language, a color-matching lab, or a promise that one exported PNG will look identical on every film, cup, and garment. In that case, write your own process with a specialist, then come back only if you still need printable pages and a simple issue log.
- Use this kit when the same file questions keep delaying press time.
- Use it when one counter accepts more than one print process.
- Do not expect it to replace a RIP, a store builder, or an automatic preflight tool.
- Do not buy it first if you never accept customer artwork.
Write shop rules before you send anything to customers
Do not start by decorating the PDF. Start with a one-page list of rules your shop will actually enforce. Shops disagree on color mode, accepted file types, and whether they repair files. If you copy another shop’s public guidelines word for word, you will promise RGB when your workflow wants something else, or you will accept JPG files you later refuse. Write your own rules from the jobs you print this month, then put those rules on the instruction sheets.
At minimum, decide six facts. What file types you accept for raster art, and whether you also accept vector files. Whether you want a transparent background, and what happens if a white or colored box is still in the file. What “final size” means in your shop: the print size on the garment or cup, not the size of a thumbnail. Whether customers should mirror artwork — many garment workflows print in the readable direction and mirroring causes a reverse press that will not qualify as a shop error. Whether you accept gang sheets the customer nested, or only single designs. What you do when a file is too soft, too thin, or full of faded edges: reject, quote a repair, or print as submitted.
Write the refusal line in plain language. “Files print as submitted” is a real policy some shops use. “We will repair the file for a fee” is a different policy. “We will not print mirrored art, hate content, or screenshots we cannot verify” is a third. Pick the policy you can keep on a busy Saturday. If two owners would answer the same email differently, the instruction sheet is not ready. Put the chosen line on the PDF and on the card so the counter, the inbox, and the tracker all say the same thing.
- Write the rules your shop will enforce, not another shop’s public spec.
- Decide file types, transparency, final size, mirroring, gang sheets, and repair policy first.
- Use one refusal line the whole team can repeat.
- Do not publish a rule you will waive for the next rush order.
Fill the printable upload instruction sheets
The printable PDF sheets are the customer-facing version of those rules. Keep them short enough to read on a phone. A useful sheet answers the questions that create reprints, in the order a customer actually prepares a file. Name the process at the top: DTF for fabric, UV DTF for hard surfaces, sticker, or decal. If one sheet tries to cover every process, customers will follow the wrong paragraph. Make a sheet per process if your shop runs more than one.
Tell customers what to export, not what software you wish they used. Preferred format is often a PNG with a transparent background, because JPEG has no transparency and a leftover white box will print as a rectangle. Many shops also accept vector files for logos. If you accept PDF, AI, EPS, or SVG, say whether fonts must be outlined and whether the page size must match the design. If you do not want customers to send Canva links without edit access, say so. If a ZIP of twenty versions named final_v3 will stall the job, say that you need one production file per order.
Leave room for the checks that depend on your equipment. Resolution is usually discussed as effective detail at the final print size, not as a magic number copied from a blog. Color mode is shop-specific: some workflows prefer RGB PNG files, others convert toward CMYK plus white. Thin lines, tiny text, and soft transparent fades behave differently on film than they do on a screen, especially when a white underbase sits under the color. UV DTF on cups and hard goods often needs cleaner edges and less fade than a large garment print. Write the version that matches your press, then add one sentence about color: a screen preview is not a color match, and neon or metallic looks are often outside what the printer can lay down.
- Give each print process its own short sheet when the rules differ.
- State the export format, background, and how many files belong in one order.
- Describe final size and detail in shop language, not copied numbers from another website.
- Warn that fades, hairline strokes, and leftover backgrounds print as submitted.
Edit the customer instruction cards so they match the counter
The PPTX cards are for the places a PDF attachment gets ignored: the counter, a pickup table, a packing insert, or a photo you send after a deposit. Edit them in PowerPoint or a compatible app so the shop name, process names, and the same six rules appear in the same words as the PDF. If the card says “PNG only” and the PDF says “PNG or vector,” customers will argue the looser version. One wording set is the whole point.
Keep the card to actions, not a lecture. A strong card has a title a customer can read from a few feet away, three to five checks, and one next step: how to send the file and what to put in the filename or order note. Include the order ID rule you actually use. “Name the file with the order number and the print size” prevents a folder of logos with no owner. If you collect files by email, state the subject line. If you collect them through a form or a shared folder, state that path. Do not list five upload methods unless your team checks all five.
Print a test card at the size you will actually display. A crowded card that looks fine on a laptop becomes unreadable in a sleeve or on a phone screenshot. Check contrast, margins, and whether your shop hours or turnaround note still fit after you add your name. Colors can vary by screen and printer, as the listing notes. If you need a weatherproof counter sign, that is a separate print job, not something this digital kit ships. Use the card as the short version of the PDF, then store the working PPTX with the master ZIP so a later edit does not fork into two shops’ worth of rules.
- Match the card wording to the PDF wording before you print.
- Show the send method, filename rule, and three to five file checks.
- Test-print the card at display size and fix crowding before you copy it.
- Keep one working PPTX with the master files so later edits stay aligned.
Use the issue tracker as a job record, not a chat log
The Excel customer file issue tracker is the inside page. Its job is to connect one order to one file, one problem, and one next action. Open a working copy, not the master. Create one row when the file arrives, not after the reprint. If art arrives by email, text, a form, and a USB drive, the tracker is where those paths become one record. Duplicate folders named “final_really_final” are how the wrong version reaches the gang sheet.
Record only what you will look at again. A useful row has an order or ticket ID, customer name or shop handle, process (DTF, UV DTF, sticker, decal), due date or promised window, filename, the issue in one phrase, status, and the follow-up you already sent. “Blurry at 12-inch chest print,” “white box around logo,” “mirrored on purpose?,” and “thin script on a tumbler wrap” are issues a later shift can understand. A paragraph of chat copied from the phone is not. If you need the full message, keep it in the original thread and put the link or date in the notes field rather than pasting the whole conversation.
Status should be boring and shared. Examples that work in a small shop: waiting on file, file received, needs customer fix, shop reviewing, approved to print, printed, picked up, reprint requested. Pick a short list and do not invent a new status for every mood. Assign one owner per open row. When two people “kind of” own a file, nobody rejects it before powder hits the film. Close the row when the customer has the goods or when you have a written decision not to print. A tracker full of open rows with no owner is a second inbox, not a system.
- Open a working workbook and keep the original file untouched.
- Make one row when the file arrives, tied to one order ID.
- Write the issue in a phrase a later shift can act on.
- Use a short shared status list and one owner per open row.
Catch the file problems that delay the first press
Most delayed jobs fail the same checks. The file looks sharp on a phone and collapses at print size. A customer enlarged a small web image, a WhatsApp photo, or an Instagram screenshot. Effective detail is about pixels at the size you will print, not about how the thumbnail looks in a text thread. If you open the image at 100 percent and the edges are already soft or blocky, they will not get better on film. Put that check on the instruction sheet, and log it in the tracker as “too soft at requested size” instead of a vague “quality issue.”
Backgrounds are the second cluster. A PNG that still has a white rectangle, a gray checkerboard flattened into gray, or stray pixels around a logo will print those extras. JPEG cannot hold transparency, so it is a poor default when the design should sit on a shirt or a cup with no box. Soft transparent fades and tiny dropped-out details also surprise people, because a white underbase can make a fade look heavier or patchy. Hairline strokes and tiny script fail next, especially on UV DTF for tumblers and hard surfaces, where crisp outlines and solid areas matter more than a delicate screen effect.
Layout mistakes waste film even when the art is sharp. An artboard much larger than the design can import smaller than intended. A customer-built gang sheet with no spacing, mixed white-only designs on a color sheet, or several designs in one upload can stall nesting. Some shops refuse customer-nested sheets; others accept them with a spacing rule. Write your rule. Do not ask customers to mirror garment art unless your process truly needs it. If a file includes spot colors, neon promises, metallic effects, or a brand color the customer expects to match a painted wall, say in the sheet that those looks may shift, then note the expectation in the tracker before anyone quotes a reprint.
- Check detail at the real print size, not at thumbnail size.
- Reject or flag leftover backgrounds, JPEG boxes, and messy transparency.
- Watch thin lines and fades on UV DTF hard-surface jobs.
- Log layout, mirroring, and color-match expectations before the job is nested.
Keep DTF fabric jobs and UV hard-surface jobs from mixing
DTF for fabric and UV DTF for hard goods are easy to blur at a shared counter because both start with “send a PNG.” They do not end the same way. Garment transfers are pressed with heat. UV DTF wraps and decals are typically applied to cups, glass, acrylic, metal, and other non-porous surfaces, often as a peel-and-apply film. A file that is acceptable as a large chest print can still be a poor tumbler wrap if the edges are fuzzy, the wrap size is wrong, or a fade turns into a mottled clear patch. Put the process name in the tracker row before anyone opens the layout tool.
Give each process a size language customers can follow. For a shirt, that is usually width and placement, such as an 11-inch chest print, not “make it bigger.” For a cup or tumbler, that is the wrap size your shop actually prints, plus a reminder that important detail should not sit on the trim edge. For stickers and decals, say whether you need bleed and whether a background should print. If a customer sends one file and asks you to use it on a shirt and a cup, that is two jobs, two rows, and often two instruction sheets. Pricing and turnaround can differ; the tracker should not pretend they are one line.
Sticker and decal work belongs in the same kit only when you already take those files through the same intake person. If your sticker cutter wants a different contour, a different file type, or a different color expectation than your DTF film, write that on its own sheet. The Excel file can still hold every issue in one workbook if the process column is honest. What you should not do is reuse a garment instruction card at the tumbler station because it was already printed. Wrong instructions are worse than no card.
- Name the process on every instruction sheet and every tracker row.
- State size and placement in the units that process actually uses.
- Treat a shirt file reused on a cup as a second job.
- Do not hand a garment card to a UV or sticker customer.
Run the first week without drowning in reprints
Set the kit up in one sitting, then use it on real orders for a week before you redesign the wording. Day one: copy the master files, write the six shop rules, and fill one PDF sheet plus one card for the process you run most. Day two: add the second process if you have one. Import or type a handful of open jobs into the workbook so the columns feel real. Do not wait for a perfect color-managed policy document. A short sheet you will hand out beats a long guide nobody sends.
During the week, log every time you repeat yourself. If three customers hit the same problem, the instruction sheet is missing that line, or the line is too weak. Common first-week gaps are “do not send a screenshot,” “one production file per order,” “tell us the print size in the filename,” and “we print readable, not mirrored.” Update the working PDF and PPTX once, then send the new version with the next quote. Leave the tracker rows as history. Changing old issue phrases to match new wording makes the log harder to read, not easier.
End the week with a short review. How many jobs waited on a customer fix. How many reprints were a shop nesting error versus a file that should have been refused. Which status labels nobody used. Which owner left rows open overnight. Adjust the status list and the refusal line if they did not match real behavior. If the workbook is too heavy for your volume, hide unused columns rather than starting a second spreadsheet. Two live trackers recreate the exact confusion the kit is meant to stop.
- Launch one process sheet and one card before you design a full packet.
- Log repeated customer questions and fix the sheet once, not in every chat.
- Review refusals, reprints, and open rows after the first week.
- Keep one live workbook; hide unused columns instead of splitting files.
Choose this kit or a neighboring workflow
Choose this focused download when the missing piece is customer-facing upload language plus a simple issue log for artwork that will be printed. It fits a DTF, UV DTF, sticker, decal, or small custom print shop that already has equipment and needs fewer messy files, not a new identity system. It also fits if you want printable PDF pages, editable PPTX cards, and an Excel tracker you can keep beside the inbox without buying a full shop-management platform.
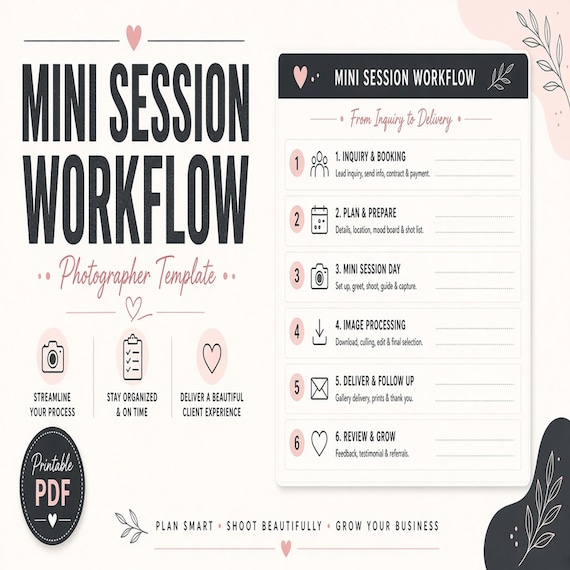
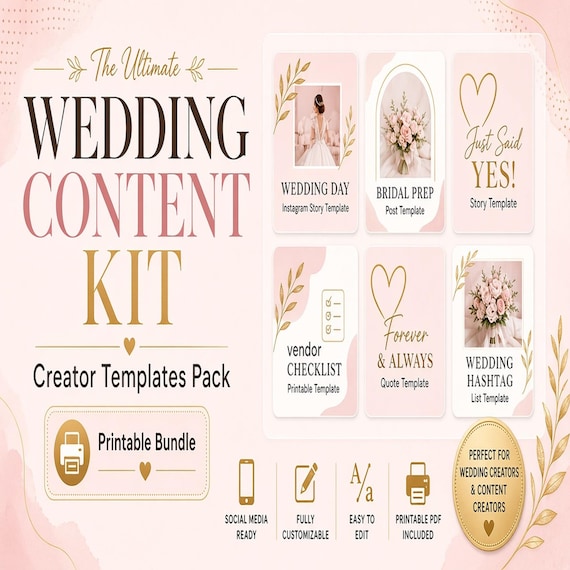
Choose a neighboring tool when the missing job is different. Use the photographer mini-session workflow when the files you collect are shot lists, client prep, and session notes rather than print-ready artwork. Use the wedding content-creator starter kit when the work is a wedding-day timeline, questionnaire, and deliverable log. Use handmade soap and candle product cards when the print job is your own batch labels and scent cards, not customer uploads. Use the iPad photo booth templates or photo booth email kit when the customer-facing pieces are event screens, flyers, and booking replies rather than film and wraps.
This kit may not be the right fit if you need a hosted upload portal, automatic DPI rejection, a RIP preset, a gang-sheet nesting program, or a contract a lawyer has approved. It is also the wrong first purchase if you do not yet know whether the bottleneck is artwork intake or pricing and booking. In that case, fix the offer and the calendar first. Confirm the current title, price, file list, and related downloads on the product page before you leave for checkout.
- Use this kit when customer artwork intake is the bottleneck.
- Use photographer or wedding-creator kits when the files are session plans, not press files.
- Use product-card or booth kits when the customer-facing piece is a label, screen, or booking email.
- Confirm the current file list on the product page before opening Etsy.
Watch for setup mistakes that send the wrong file to press
The kit fails in predictable ways. The first is publishing another shop’s file spec without testing it on your work. Customers will meet that spec and still be unprintable on your press. The second is one instruction sheet for every process, so a tumbler file follows garment advice. The third is accepting “I’ll fix it later” files into the approved-to-print column. The fourth is letting the tracker lag by a day, which means the person nesting film is still working from chat. The fifth is two owners, two inboxes, and no order ID on the filename.
A sixth mistake is rewriting the PDF after every difficult customer until the sheet is a short story. Add a line only when the same issue repeats. A seventh is printing the card, then editing the PDF, and never updating the card. An eighth is using the workbook as a full customer database with addresses, card numbers, or details your shop should not keep in a generic spreadsheet. Keep the tracker to file and job status. Follow your own privacy, payment, and record rules. These pages help you explain a process. They do not inspect a file for you, match a brand color, or approve a reprint.
Do a final pass after you fill the first real rows. Every open job should have a process name, an order ID, a filename, a status, and an owner. Every public sheet should match the card and the refusal line you actually use. If a rule cannot pass that check, pause it. A short honest intake path is more useful than a decorated packet nobody reads. Digital files only. No physical item ships. Buyer is responsible for checking suitability for their own workflow and local or business requirements.
- Publish rules you have tested on your own jobs.
- Keep process names, filenames, and order IDs on every open row.
- Update the card when you update the PDF.
- Do not store extra personal or payment details in a generic issue log.
- Remember that the kit explains intake; it does not print, color-match, or guarantee a file.
Printables used in this guide
Instant downloads from the SteadyStackStudio Etsy shop.
Mini Session Planner for Photographers
Plan mini-session dates, clients, shot lists, outfit-prep notes, gallery delivery, and follow-up steps.
Wedding Content Creator Kit
A practical digital template bundle built around an urgent buyer need: Client intake, shot list, wedding-day timeline…

Candle Care Card and Soap Label Templates
Soap and candle makers who need real label/card sheets for markets and shops — not a thin one-page mockup.

iPad Photo Booth Templates
A downloadable iPad photo booth template bundle with start screens, overlay assets, flyer designs, contract-style forms and…