Small Business Templates · Jul 28, 2026 · 13 min read
Pottery Studio Inventory Workflow: Batch IDs, Kiln Logs, Pricing, and Sale Tags
A practical setup guide for connecting pottery batch and piece references to kiln-run notes, finished inventory, pricing decisions, and accurate sale tags.
Confirm that the kit matches the studio job
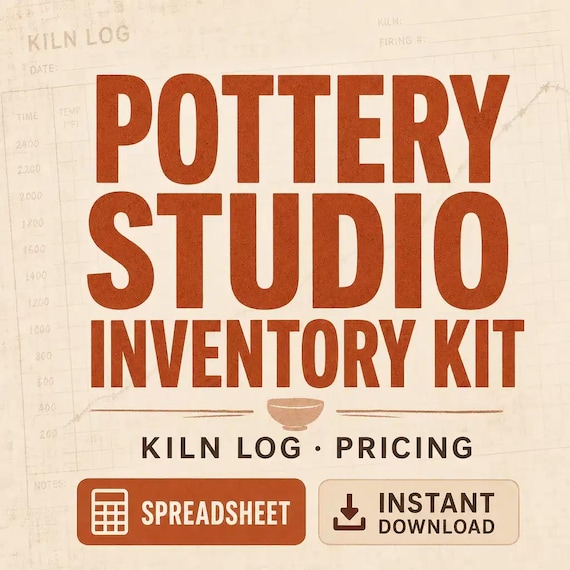
A useful pottery record should let you answer four questions without reconstructing the story from memory: which piece or batch is this, which kiln run did it pass through, what is its current inventory status, and which approved price or tag belongs with it? The featured SteadyStackStudio Pottery Studio Inventory Kit is designed around that connected job. The current listing describes an Excel pottery inventory and pricing tracker, a printable kiln log and sale-tag PDF, editable product-tag templates in PowerPoint format, a quick-start PDF, and a README/license note, delivered as a digital download.
That file mix matters. The spreadsheet is suited to records that change, the printable pages can travel to a kiln or packing area, and the editable tag file supports customer-facing output. It is not a kiln controller, firing schedule, ceramic recipe, accounting service, point-of-sale system, physical tag pack, or safety course. Before purchase, inspect the latest previews and file list, confirm that your device can extract the download, and make sure you have compatible software for XLSX and PPTX files as well as a PDF reader and any printer you plan to use.
- Choose this type of kit when batch, kiln-run, inventory, pricing, and tag records need to connect.
- Confirm the current XLSX, PDF, PPTX, quick-start, and README contents in the listing.
- Check software, ZIP access, printer, paper, and editing needs before checkout.
- Skip it if the main need is firing instruction, bookkeeping service, live inventory software, or physical supplies.
Give each file one clear responsibility
Start with one controlled record instead of trying to make every file hold the whole workflow. A practical setup uses the workbook as the current inventory and pricing record, the printed kiln page as a working record near the firing process, and the PPTX file as the source for approved product tags. The printed page should feed reviewed information back into the workbook; the tag should be produced from the current approved record. This creates a direction of travel instead of three competing versions.
Keep one untouched copy of the download before customizing anything. Make a separate working copy for the studio, then decide who may change status, price, or tag wording. A whiteboard, notebook, or sticky note can still help during the day, but it should not quietly become the only place where a piece changes from in progress to available or sold. When a temporary note affects inventory, move the reviewed change into the controlled record and retire the note.
- Use the workbook for changing inventory and pricing information.
- Use the printable kiln page at the point where a paper record is easier to maintain.
- Use the PPTX template for tags only after the source details are approved.
- Protect a blank master copy and make studio changes in a separate working copy.
Create reference codes that survive the full process
Names such as “blue mug” or “small bowl” stop being useful as soon as several similar pieces share a shelf. Create a short reference system before the first records are entered. A studio may need a batch reference for pieces made together, a piece reference for an individual item, and a kiln-run reference for one firing. Those codes describe different relationships, so do not force one number to do all three jobs.
The exact pattern is a studio choice rather than a feature promised by the template. Keep it short enough to write on a working label and distinctive enough to search in the workbook. Avoid putting a price, shelf location, or current status inside the permanent code because those details can change. If an item moves, is repriced, or is held for review, its identity should remain stable. When a code is corrected, preserve enough of the old reference to reconnect paper notes, photographs, tags, and run history rather than silently creating a second item.
- Use separate references for a making batch, an individual piece when needed, and a kiln run.
- Keep permanent identity separate from price, location, and sale status.
- Choose characters that remain readable when handwritten or printed small.
- Check for duplicate codes before a new batch or firing record is released for use.
Map the stages your studio actually uses
Inventory becomes trustworthy when every status has one meaning. Write a short sequence that matches the studio’s real process. Depending on the work, that may include stages such as forming, drying, greenware, a first firing, glaze preparation, a later firing, studio review, available, reserved, sold, seconds, or hold. Use only the labels your studio understands, and add a plain definition for any stage that staff or students might interpret differently.
Do not count every work-in-progress piece as sellable stock. A physical item can exist while still waiting for a firing, inspection, price decision, or tag. Decide which checkpoint changes it into available inventory, who can approve that change, and what happens when a piece needs review. If you make sets, decide whether the set and its components need separate identities. The aim is not to create more data; it is to stop one physical piece from appearing in several totals or disappearing between shelves.
- Use a small set of stage labels with written meanings.
- Define the exact checkpoint that makes a piece available for sale.
- Keep hold, seconds, reserved, sold, and unavailable states visibly different.
- Decide how sets, pairs, and individual components will be counted before tagging them.
Use the kiln log as run history, not as firing instructions
Assign the kiln-run reference before loading so the pieces and the paper record can be connected from the beginning. Record the piece or batch references included in the run using the level of detail your studio needs. Add the studio-approved schedule name or reference, relevant setup notes, timing, checks, and observed outcome only if those details belong in your established process. Write what actually happened rather than copying the intended plan forward after the run is complete.
The printable kiln log is an organizational record. It does not establish a safe firing schedule or replace the kiln manufacturer’s instructions, trained supervision, ventilation requirements, material guidance, maintenance, or studio safety procedures. If the planned load, material, program, equipment condition, or result raises a concern, pause and use qualified guidance. A clean log is valuable because it helps the studio locate the run connected to a piece and compare its own reviewed history; it is not permission to repeat settings without professional judgment.
- Create the run reference before loading and connect it to the included piece or batch references.
- Separate the intended plan from actual observations and later review notes.
- Use names and terminology already approved in the studio’s firing process.
- Follow manufacturer guidance and established safety procedures instead of treating a template as technical instruction.
Keep glaze notes attached to the correct piece and run
The current kit is described as supporting glaze notes, but those notes are only useful when they can be traced to the correct work. Use a consistent glaze or finish reference rather than relying on phrases such as “the green one.” If the studio records application details, combinations, test references, placement, or other observations, keep the wording controlled enough that another authorized person can understand what the note refers to. Link the note to the piece or batch and to the relevant kiln run.
Preserve observations even when an outcome is not selected for sale. Overwriting an earlier note with the final opinion removes the history that explains why a piece was placed on hold or why a later test changed. Keep any photograph or test tile reference in the studio’s normal storage system and record only the link or identifier needed to find it. Materials and results can vary, so a past note is evidence from the studio’s own work, not a guarantee that a later piece will look the same.
- Use consistent glaze or finish references instead of color descriptions alone.
- Connect each note to the right piece or batch and kiln-run reference.
- Keep observations distinct from approval, pricing, and sale status.
- Treat prior outcomes as studio history, not as guaranteed results.
Reconcile every unload before inventory grows
After the run is complete and the studio’s normal handling and review steps have been followed, compare the physical unload with the load record. Work from one shelf or group at a time. Confirm that each item can be matched to its piece or batch reference, then record the observed outcome and next status. If an identity is uncertain, place the item in a review location rather than guessing and adding it to available stock.
This is also the moment to catch quantity problems. A planned group may have fewer finished pieces than expected, a set may no longer be complete, or an item may need a separate review. Update the record from the physical count rather than from the original making target. Keep “finished” separate from “available” until the studio’s inspection and pricing checkpoints are complete. A short unload reconciliation prevents later sale tags, online quantities, and market packing lists from being built on an optimistic count.
- Compare the physical unload with the run record before updating available stock.
- Move uncertain identities or outcomes into a clear review status.
- Use actual finished counts rather than the quantity originally planned.
- Do not generate sale tags until the piece identity and sale status are approved.
Track location as carefully as status
An available piece is not useful inventory if nobody can find it. Choose location labels that match the studio: a numbered shelf, market bin, photo area, packing station, gallery delivery, or another controlled destination. Update location when the piece moves, not at the end of the month. Avoid vague entries such as “studio” when several rooms or shelves are involved.
Keep location and status in separate fields or clearly separate notes. A piece can be available on a studio shelf, reserved in a pickup area, or moved to a market bin without changing its identity. When stock is prepared for an event or online release, mark that allocation so the same item is not promised twice. After the event, reconcile what returned, what sold, and what remains off site before restoring any quantities. This small discipline is what turns an inventory list into a reliable finding and handoff tool.
- Use specific shelf, bin, event, pickup, or off-site location labels.
- Change location when the physical piece moves.
- Keep available, reserved, sold, hold, and location information separate.
- Reconcile event and off-site stock before returning it to general availability.
Move reviewed costs into pricing without mixing the jobs
The featured workbook includes a pottery pricing role, but a calculator is only as useful as its inputs and definitions. Decide which costs the studio reviews for a piece or batch, such as materials, direct work time, firing-related allocation, finishing, packaging, selling fees, and overhead. Use categories that fit the business and document how shared costs are handled. Do not hide an estimate inside a field that another person will read as an exact measured cost.
Keep cost, planned price, approved selling price, discount, and final sale amount distinct. A price can change without changing the piece code or erasing the cost history. Require a review before a new price is copied to customer-facing tags or sales channels. The workbook is an organization and planning tool; it does not guarantee a profit, determine market value, calculate every tax obligation, or replace an accountant. If cost and margin analysis is the main task, the companion craft pricing guide provides a deeper setup than this piece-to-sale workflow.
- Define every cost category and distinguish measured values from estimates.
- Keep cost, planned price, approved price, discount, and actual sale amount separate.
- Record the review point that approves a price before it reaches a tag.
- Use qualified financial or tax guidance where the business requires it.
Build sale tags from the approved inventory record
The current download includes printable sale-tag pages and editable PPTX product-tag templates. Use them as outputs from the reviewed inventory record, not as a second inventory system. Decide which approved details a customer needs to see, then keep the wording consistent across pieces in the same collection. If the studio uses a piece code on the tag, make sure it points back to the same workbook record used for status and price.
Proof one demanding example before producing a full set. Choose a long product name, a higher price, and any detail most likely to wrap or clip. Print at the actual size, cut it, place it with the real display, and check readability under the lighting customers will encounter. Confirm that the tag does not cover or risk damaging the piece and that the price matches the current approved record. Screens and printers can reproduce size and color differently, so use the physical proof as the decision point. When a price changes, retire or clearly replace the old tag instead of leaving both versions in the packing bin.
- Generate tags only from reviewed piece identity and price information.
- Proof the longest and most crowded tag before printing the batch.
- Check actual size, trimming, readability, placement, and printer variation.
- Remove superseded tags so an old price cannot return to the display.
Prepare a pottery drop or market from allocated stock
Build the drop or market list from pieces already marked available. Assign each selected piece to that release or event, confirm its physical location, and make sure the correct tag travels with it. Pack from the list and check the item off only when it enters the box or event bin. If the piece remains listed somewhere else, use the business’s normal availability controls so one item is not sold through two channels.
At closeout, record sales and returns from the physical stock before relying on a remembered total. Match sold items to their piece references, move returned work to its verified location, and isolate anything that needs condition or tag review. Keep sales reconciliation, payment processing, tax records, and platform updates in the systems chosen for those jobs; the pottery kit does not replace them. The inventory record should finish the event by showing what the studio still owns, where it is, and whether it is ready for the next sale.
- Allocate only approved available pieces to the release or market.
- Pack against piece references and verified tags rather than visual memory.
- Prevent the same unique item from remaining available in conflicting channels.
- Reconcile sold, returned, missing, and review items before closing the event record.
Use three short checkpoints to keep the system current
A pottery tracker does not need constant data entry if updates happen at the moments that change the work. First, check references and the planned run record before loading. Second, reconcile pieces, observations, and next status after unloading and review. Third, verify availability, location, approved price, and tag before a release, market, delivery, or pickup. These checkpoints are easier to remember than an open-ended instruction to update the spreadsheet later.
Add a brief regular review for unresolved holds, unnamed pieces, duplicate codes, stale locations, old tags, and temporary notes that never reached the workbook. Back up the working file using the studio’s normal storage practice and keep the clean original download separate. If a field is repeatedly skipped, decide whether it is unnecessary or whether the update point is unclear. Remove clutter only after confirming that the information is not needed for safety, accounting, business, or professional records maintained elsewhere.
- Checkpoint one: references and run record before loading.
- Checkpoint two: physical reconciliation and next status after review.
- Checkpoint three: availability, location, price, and tag before handoff or sale.
- Review unresolved exceptions and back up the working file on a consistent schedule.
Choose the pottery kit or the narrower tool that fits
Choose the featured Pottery Studio Inventory Kit when the main job is connecting small-batch pottery records, kiln-run notes, glaze observations, inventory, pricing, and sale tags across XLSX, PDF, and PPTX files. It is the best match for this workflow because the product-specific records stay connected from studio work to customer-facing tags. Review the latest listing, preview images, delivery instructions, software needs, and license before opening Etsy.
Choose a dedicated handmade or general product-pricing calculator when cost and margin work is the central gap and pottery run records are already organized. Choose the jewelry inventory and craft-show tracker when display tags and event sales for jewelry are the actual job. Choose the Etsy seller profit tracker when listing fees, advertising, and shop-level performance need attention, or a side-hustle or profit-and-loss tracker when the need is broader income and expense organization. Select the smallest current download that solves the recordkeeping gap you truly have. None of these digital templates supplies physical products, kiln operation, ceramic safety instruction, bookkeeping, tax advice, legal review, or guaranteed business results.
- Use the pottery kit for connected piece, run, inventory, pricing, and tag organization.
- Use a dedicated pricing tool when costing and margin decisions are the primary task.
- Use an event- or shop-level tracker only when its records match the business question.
- Skip the purchase if the current previews, formats, or scope do not fit the studio’s real workflow.
Printables used in this guide
Instant downloads from the SteadyStackStudio Etsy shop.
Pottery Studio Inventory Spreadsheet
This is a premium digital template kit for ceramic artists, pottery studios, market potters, small-batch makers, and class-based…
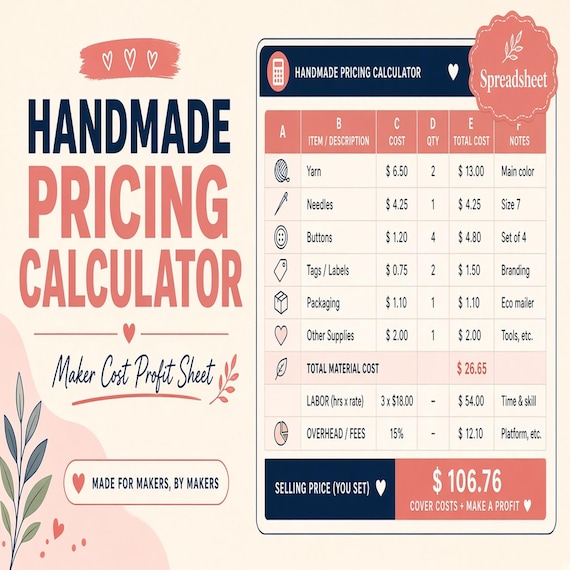
Handmade Pricing Calculator Spreadsheet
Handmade pricing calculator and craft inventory spreadsheet for sellers who need to price products, track material costs…
Product Pricing Calculator Spreadsheet
Product Pricing Calculator Spreadsheet with Small Business Profit Margin, Cost of Goods, Wholesale and Retail Price Excel PDF…
Jewelry Display Tags Printable
Jewelry makers and craft-show sellers who need printable display tags and a practical inventory spreadsheet — without fake…