Beauty & Wellness Forms · Aug 2, 2026 · 14 min read
PMU Paperwork Workflow: Connect Intake, Color Notes, Touch-Ups, and Aftercare
A practical setup guide for turning a PMU form bundle into one clear client record from initial intake and consent through color notes, touch-up tracking, aftercare, and closeout.
Confirm what the current PMU download includes
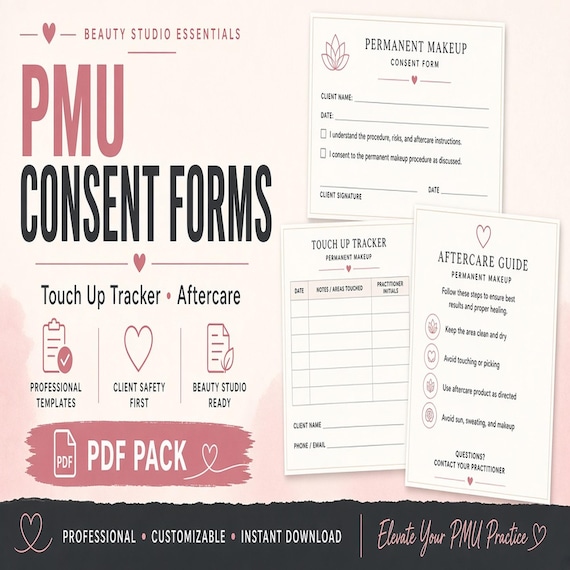
The featured PMU Consent Form Bundle is currently described as a digital template kit for permanent makeup artists, brow PMU studios, beauty service owners, and solo artists. The current download lists printable PDF workbook or form pages, an editable DOCX template, an Excel XLSX tracker, and a README or license note. Its stated roles include client intake, consent, color notes, touch-up tracking, aftercare, and appointment records. No physical forms or finished binder are shipped.
Use those details as a fit check, not as permission to assume more. The current description does not promise a hosted form portal, electronic signatures, automatic reminders, booking software, secure client storage, custom legal wording, or professional review. Look through the current previews, confirm that your software can open the listed formats, and compare the delivered files with the product description before entering any client information.
- Expect PDF, DOCX, and XLSX files rather than printed paperwork.
- Confirm that intake, consent, color notes, touch-up, aftercare, and appointment-record roles match your needs.
- Check the current inside-page previews and file details before checkout.
- Plan separate systems for anything the listing does not say is included.
Start with the appointments you actually provide
Before editing a form, write the real path a client follows in your studio. Begin with the inquiry or booking step, then mark when intake is reviewed, when the current consent process happens, where the service and color notes belong, how aftercare is handed over, how a future touch-up is tracked, and what closes the record. This reveals whether you need the complete kit or only a smaller set of its pages.
Do not let a polished template define your service menu or professional process. A permanent makeup form should only be used for services the qualified provider actually offers and understands. If your studio uses different appointment paths for different PMU services, map each one separately and check whether the supplied wording can be adapted without becoming vague. The template organizes information; it does not provide training, determine suitability, or replace the provider's judgment.
- List every handoff from booking through the last planned follow-up.
- Mark which page or record supports each handoff.
- Remove unused pages instead of giving every client a generic stack.
- Keep service decisions within the studio's qualified, reviewed process.
Protect the downloaded masters before customizing anything
Save the delivered files together in a clearly named master folder and keep them unchanged. Store the README or license note with that original set. Then duplicate the DOCX for studio wording, keep the PDF as the supplied print reference, and make a separate working copy of the XLSX tracker. This gives you a clean starting point when a page is deleted accidentally, a spreadsheet formula or heading is changed, or an older studio version needs to be compared with the current one.
Use names that show purpose and date, such as PMU Forms - Studio Working Copy - 2026-08-02. Avoid final, final-new, and final-two. When the wording is approved for use, give that blank set a version name and retire the earlier blank version from counters, tablets, shared folders, and print stations. Keep client records separate from the purchased blank templates so an export, backup, or staff share does not mix private information with reusable source files.
- Keep one untouched master set with its current README or license note.
- Edit duplicates rather than the only copy of the download.
- Date or version every blank set that reaches clients.
- Store completed client records away from reusable blank templates.
Map each form to one clear moment in the client journey
A useful form set answers who uses each page, when it appears, and where it goes next. Intake belongs early enough for the responsible provider to review it before the service decision. Consent belongs in the studio's approved conversation and signature process. Appointment and color notes belong with the record of what actually happened. Aftercare belongs in a client-facing handoff. The touch-up tracker belongs in follow-up planning, not in place of the complete client record.
Create a one-page staff map using the exact delivered filenames. For each file, write its role, the person responsible, the point at which it is complete, and the approved storage location. If two pages collect the same information, decide which one is authoritative rather than asking clients to repeat details without a reason. If a page does not have a clear owner or next step, set it aside until the studio can define one.
- Intake: collect and route information for provider review.
- Consent: use the current approved wording and signature process.
- Appointment and color notes: record the completed service under the studio's established requirements.
- Aftercare: give the client the current reviewed instructions.
- Touch-up tracker: show follow-up status while pointing back to the full record.
Customize the DOCX as a controlled blank, not a live client file
Use the editable DOCX to add the business name, contact route, exact service names, reviewed policy references, and the wording your studio is permitted to use. Read every prompt from the client's point of view. Remove instructions that do not apply, replace obvious placeholders, and make signature and date areas easy to find. Keep the language plain enough that a client can ask a question before signing instead of treating the form as a wall of fine print.
A purchased template is a starting structure, not a finished legal, medical, licensing, insurance, or compliance document. Have the final wording reviewed wherever your regulator, insurer, attorney, supervising professional, or studio policy requires it. Once the blank version is approved, export or print from that controlled copy. Do not keep editing the same DOCX after it has been used to create signed records; changes belong in the next blank version, not inside a completed client file.
- Add only current business, service, contact, and policy information.
- Delete unused or unapproved language before clients see it.
- Keep the approved blank version separate from every completed record.
- Record the version date so the studio can identify which wording was used.
Run one fictional client through the full set
Before using the pages with a real client, complete a dry run with clearly fictional information. Start at intake and move through the studio's review, consent, appointment notes, color notes, aftercare handoff, tracker entry, and closeout. The goal is not to test PMU technique. It is to find repeated questions, missing handoffs, unclear page order, tiny writing areas, hidden signature lines, and records that cannot be matched after the papers are separated.
Test the formats in the way the studio plans to use them. Print the PDF pages that will be printed and check contrast, margins, page order, and writing space. Open the edited DOCX on the actual office computer and reopen an exported copy. Enter one fictional row in the working XLSX and confirm that long names, dates, and status notes remain readable. Do not assume the PDF is fillable or that the spreadsheet sends reminders unless the current files explicitly demonstrate those features. Delete the fictional data after documenting the changes needed.
- Use unmistakably fictional names and details during testing.
- Follow the complete handoff rather than checking each file in isolation.
- Inspect the real printer, computer, folder, and spreadsheet view the studio will use.
- Fix one workflow problem at a time, then repeat the dry run.
Give every client one stable record reference
Choose a simple internal reference that can connect intake, the signed record, appointment notes, color notes, the aftercare handoff, and the touch-up tracker without putting a full client name in every filename. The reference should be unique, readable by authorized staff, and created through the studio's existing record process. Use the same value consistently instead of inventing a new nickname or abbreviation at each visit.
A stable reference reduces the chance that a tracker row points to the wrong paper packet or that a follow-up note becomes detached from the initial appointment. It does not make an ordinary folder secure. Keep the crosswalk between a reference and a person inside the approved client system, limit access, and avoid placing private details in public calendars, casual message threads, or shared design folders. If local or professional rules prescribe a different identifier, follow those requirements rather than this general organizing suggestion.
- Use one approved reference across all records for the same client journey.
- Keep the reference-to-person link in the studio's protected system.
- Avoid unnecessary personal details in filenames and tracker views.
- Check the reference before filing, updating, or handing off a record.
Keep consent, service details, and corrections synchronized
At the appointment, verify that the client identity, service name, provider, and date agree across the records your studio uses. Route changed answers through the responsible provider's review rather than copying an old intake entry forward automatically. Give the client a clear opportunity to ask questions within the studio's approved consent process. A signature should never be treated as a shortcut around the conversation, professional judgment, or any required screening.
After a record is signed or finalized, do not quietly rewrite it to make a later note appear original. Follow the studio's established correction method: preserve the original information, add a dated correction or amendment, identify who made it, and make the current meaning clear. If the studio uses a separate photo permission, marketing release, or policy acknowledgment, keep that decision distinct instead of assuming the PMU download includes it or folding it into unrelated consent language.
- Match the client, date, service, and responsible provider across connected records.
- Review changed information before relying on an earlier answer.
- Preserve finalized records and make later corrections traceable.
- Keep optional permissions separate from the core service record when appropriate.
Record color notes so the next visit is understandable
The current product description specifically includes color notes. Decide what that page needs to communicate within your studio's qualified and reviewed practice. Separate what the client requested, what was considered, and what was actually used or completed. Copy names or references carefully from the source your studio relies on rather than using a casual shorthand that another provider may interpret differently later.
Record only the details your studio is authorized and prepared to maintain. If your established process requires product references, batch information, photos, diagrams, or other attachments, note where the protected source record lives rather than crowding everything into a public-facing tracker. Date the entry and identify the responsible provider. At a later visit, add a new dated note instead of overwriting the original color record; the sequence is often more useful than a single cell that always shows only the latest text.
- Distinguish the client's request, the reviewed plan, and the completed record.
- Use exact, studio-approved references rather than ambiguous nicknames.
- Date each entry and identify the responsible provider.
- Add later notes as a sequence instead of erasing the first appointment record.
Make the aftercare handoff a separate, visible step
The featured kit currently lists aftercare templates, but the studio must still supply the current instructions approved for the actual service. Review the wording before every version is released. Keep the client copy readable, put the studio's current contact route where it can be found, and distinguish ordinary follow-up questions from situations that the studio directs to an appropriate health professional or emergency service. Do not add outcome guarantees or advice outside the provider's scope.
Decide how the client receives the instructions and how the studio records that handoff. A printed page may need a clean standalone layout; a digital copy needs a dependable, privacy-aware delivery method the client can reopen. If the wording changes, retire the old blank version so the initial appointment and a later touch-up do not receive contradictory instructions. The appointment record can note which dated aftercare version was provided without copying the entire handout into a tracker cell.
- Use only the current provider-reviewed aftercare wording.
- Make the contact route and escalation direction easy to find.
- Record which version was handed over and by what approved method.
- Remove stale aftercare copies from print stations and shared folders.
Use the XLSX tracker as an index, not the whole record
The current download lists an Excel XLSX tracker for appointment or status follow-up. Decide which small set of status labels your studio will use and define them before adding real entries. Examples might distinguish review needed, planned, scheduled, completed, canceled, or closed, but the right labels and timing must come from the studio's actual process. A status should describe what is known now; it should not imply consent, payment, service completion, or suitability unless the underlying approved record supports that meaning.
Keep the tracker concise. Use the stable client reference, relevant date, responsible person, current status, and the next administrative action your studio needs. Point back to the protected full record for detailed intake, consent, color, service, photo, or aftercare information. The spreadsheet is not described as booking software, a message system, or an automatic reminder tool, so assign a real person to review it at a consistent time and act through the studio's approved systems.
- Define a short status list and use it consistently.
- Keep detailed client and service information in the proper full record.
- Treat every tracker status as an administrative label, not proof by itself.
- Assign a person and review rhythm instead of assuming automation.
Handle touch-ups, changes, and missed appointments without losing history
A touch-up creates a second decision point, not a reason to replace the first appointment record. Link the later visit to the same stable reference, review the information your studio requires again, and create a new dated entry for what changed or remained the same. Let the responsible provider determine timing, suitability, and service decisions. A printable template or tracker cannot make those decisions and should not be used to promise a result or a date before the studio's normal review is complete.
For reschedules, cancellations, or missed appointments, update the administrative status according to the studio's approved policy while preserving the record of what actually occurred. Make one next action clear: contact pending, new date scheduled, provider review needed, or record closed, for example. Do not mark a planned touch-up as completed because a date passed, and do not copy the prior color note into a new completed field before the later service happens. Reconcile the tracker with the calendar and full record instead of trusting memory.
- Link later visits to the original record without overwriting it.
- Create a dated entry for each actual change, review, or service.
- Use the studio's current policy for reschedules, cancellations, and missed appointments.
- Confirm completion from the full record, not from an expired calendar date.
Choose storage, access, retention, and retirement before launch
The download supplies templates, not a secure record platform. Before collecting real information, decide where blank forms live, where completed records live, who can access them, how authorized staff find them during a visit, how backups work, and how records are retained or deleted. Follow the requirements that apply to your location, license, insurer, professional role, and business rather than assuming that a spreadsheet or ordinary shared drive is appropriate by default.
Limit the information collected to what the studio has a clear reason and approved basis to maintain. Keep private records out of public links and casual messaging channels. When a blank template is replaced, label the old version as retired and remove it from daily use while preserving whatever version history the studio is required to keep. When a client record reaches its approved end of life, use the studio's documented disposal method instead of leaving abandoned files in downloads folders, email attachments, or old devices.
- Choose the approved home for blanks, completed records, trackers, and backups.
- Restrict access to people who need it for their role.
- Follow applicable retention and disposal requirements.
- Retire stale blank versions so they cannot return to the appointment flow.
Choose the PMU kit or the service-specific alternative
Choose the featured PMU Consent Form Bundle when your real need is the combination currently described: printable PDF forms, an editable DOCX, an Excel tracker, and a structure for PMU intake, consent, color notes, touch-ups, aftercare, and appointment records. Skip it if you need physical forms, custom professional review, hosted signatures, booking software, automatic reminders, or a secure record platform supplied with the purchase. Confirm the latest previews and description before deciding.
Choose a different current form kit when the appointment is actually brow lamination or lash lift, eyelash extensions, a facial treatment, waxing, tattooing, or piercing. Those services may use similar words such as intake, consent, records, and aftercare, but they do not create the same client questions or provider workflow. Compare each current product's exact service, previews, and listed file formats rather than using a PMU page simply because its layout looks close. The smallest service-specific set that fits the appointments you provide is usually easier to review and maintain than a broad stack of unrelated forms.
- PMU: use the featured kit for the current PMU-specific file and record roles.
- Brow or lash services: compare the dedicated brow-lamination, lash-lift, or eyelash-extension forms.
- Facial or waxing services: choose pages written for that treatment path.
- Tattoo or piercing services: use their dedicated consent, record, and aftercare products.
- Do not force one attractive template across services with different requirements.
Complete a one-client readiness check before going live
Finish setup by running the fictional client again with the approved blank version. Confirm that the client can identify each page, the provider can review information before the service decision, the signed record shows the correct version, color and appointment notes have a clear home, aftercare can be handed over without searching, and the tracker points back to the right protected record. Check that no test names, placeholder wording, or retired pages remain in the live folder or print station.
Then ask a staff member who did not build the setup to complete a cold read. They should be able to explain which file opens first, what stops the workflow for provider review, where a correction goes, how an aftercare version is identified, how a touch-up status changes, and where the full record is stored. Fix any answer that depends on one person's memory. The forms are ready when the journey is understandable, traceable, and maintainable without pretending the download supplies professional judgment or secure storage.
- Current approved blank version and correct service wording.
- Clear intake, consent, note, aftercare, tracker, and closeout handoffs.
- Stable reference connecting the tracker to the protected full record.
- No fictional data, placeholders, or retired pages in active use.
- A second person can follow the workflow without verbal rescue.
Printables used in this guide
Instant downloads from the SteadyStackStudio Etsy shop.
PMU Consent Form Bundle
A polished template kit for permanent makeup artists, brow PMU studios, beauty service owners, and solo artists.

Lash Tech Consent Forms
Lash tech forms bundle for lash artists and beauty studios: 26-page fillable PDF with consent, client intake, contraindication…

Facial Consent Form Bundle
Facial treatment forms bundle for estheticians and skincare studios: 26-page fillable PDF with skin analysis, client intake…
Waxing Forms Bundle
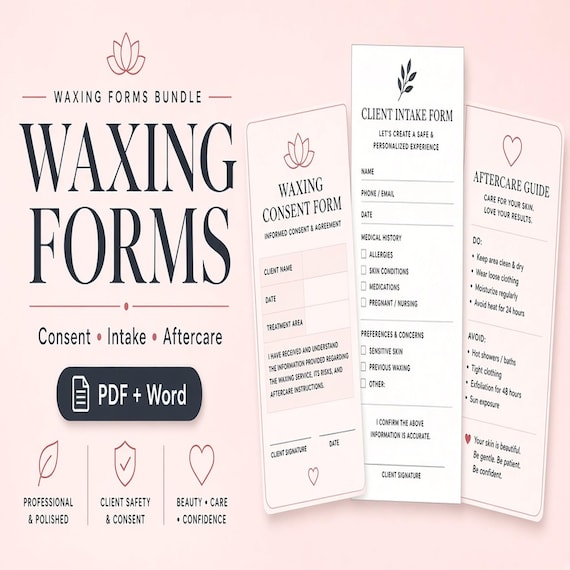
Waxing treatment forms bundle for estheticians, waxing specialists, and salon owners who need clean client intake, consent…