Tattoo Flash · Sep 7, 2026 · 20 min read
Patchwork Tattoo Flash Sheet Setup: Mix Small Motifs, Leave Skin Gaps, and Print a Consult Board
A practical setup plan for a sheet-only patchwork flash pack: confirm the JPG and PNG pages, treat each motif as a standalone patch, leave skin between pieces, and print a true-size consult board before anyone talks about stencil paper.
Confirm what the current download includes
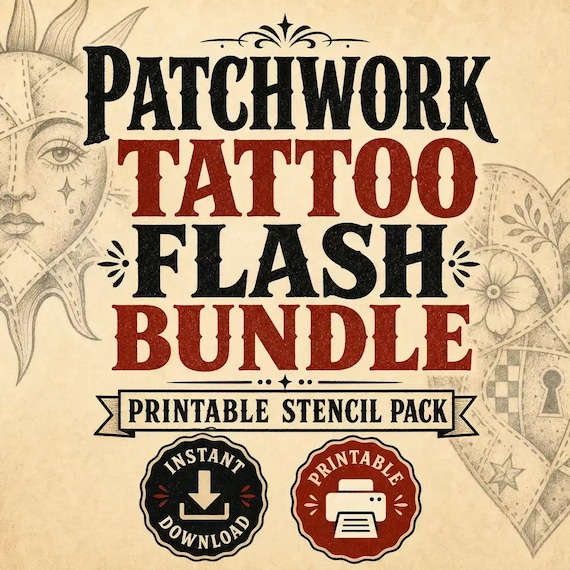
Start with the files the current listing actually describes. The SteadyStackStudio Patchwork Tattoo Flash Sheet Bundle is a printable tattoo flash sheet download for tattoo artists, flash-day planning, stencil inspiration, client mood boards, and personal tattoo idea books. The listed contents are three high-resolution printable JPG tattoo flash sheets, three high-resolution PNG exports of the same finished artwork, and a simple README or license note. It is an instant digital download. No physical flash print, stencil paper, temporary tattoo, or transfer ships.
Open the README first, then keep the original ZIP and one untouched copy. Compare the listed pieces with the job you need. This pack is a coordinated set of finished visual sheets. The listing does not name a compiled PDF, SVG or vector files, or transparent individual cutouts. If you expected a 128-design library with a separate PNG for every motif, a Procreate stamp set, or one isolated file per doodle, stop there. That is a different download.
The listing is also explicit about scope. The sheets are artwork and reference pages for inspiration, studio display, consults, and idea books. They are not a promise that every line will survive a thermal transfer, a printer, or a real placement. Colors can shift by device, software, printer, paper, export settings, and platform compression. You remain responsible for final review, printer and software settings, professional use requirements, and trademark or copyright safety for the specific project. Personal and small-commercial use are welcome for finished projects unless the included README says otherwise. Do not resell, share, or redistribute the original download files as-is.
- Verify that the ZIP matches the listed three JPG sheets, three matching PNG sheets, and README.
- Read the license note before you print a consult board or a client preview.
- Keep an untouched master copy and make a separate working copy.
- Treat the pack as finished artwork sheets, not as individual cutouts, a PDF packet, or a shipped stencil.
Decide whether a patchwork sheet pack is the right tool
This pack fits when the missing piece is a small set of mixed-motif flash pages you can browse, print, and mark up as a collage plan. Patchwork collecting is not one large connected illustration. It is a group of separate designs placed near each other, with the bare skin between them doing as much work as the ink. A studio that wants a wall sheet, a consult binder page, or a practice print can open a JPG and see several standalone ideas together. A collector building an idea book can circle candidates without unzipping a hundred separate files. The matching PNG sheets give you the same finished pages in a format that many design apps open cleanly.
It also fits when you already know the next step is a mix of small pieces on an arm, leg, or similar canvas, not a single back-piece composition. The useful question is not “which sheet looks nicest on screen.” It is “which two or three motifs could sit near each other without touching, and still read as themselves.” A sheet pack lets you print, crop, and rearrange paper patches before anyone talks about stencil paper. That check is the point of this guide. The pack does not replace a licensed tattooer’s placement, stencil, and aftercare process.
Skip this pack, or use it only as a mood board, if the job requires a separate transparent file for every design. The listing does not claim individual cutouts. Skip it if you need a vector file you can infinitely scale, a ready-made skin transfer, or a flash-day menu with coded choices pulled from a large individual-PNG library. Skip it if you wanted a physical print in the mail, or a single connected sleeve drawing with backgrounds that fill every gap. In those cases, choose the neighboring download that actually lists those files, or work with a professional who will draw the collection at the true size.
- Use this pack when you need finished mixed-motif flash pages to browse, print, and rearrange.
- Use it when the next step is a collage of standalone pieces with skin between them.
- Do not expect isolated transparent motifs, SVG files, a compiled PDF, or a shipped transfer.
- Do not buy it first if the real need is a large individual-PNG library or one connected sleeve drawing.
Protect the masters and set up a working copy
Download the ZIP once, unzip it into a folder you will not edit, and duplicate that folder for daily work. Name the master something obvious, such as original-patchwork-flash, and leave it closed. All printing, cropping, circling, and notes happen in the working copy. If a print-settings experiment flattens a PNG or a crop goes too tight, you still have the listed files.
Keep the two image formats in their roles. The JPG sheets are convenient for a quick paper print, a phone preview, or a binder page. The PNG sheets are the same finished artwork in a format many editing apps prefer. Do not assume the PNG sheets behave like isolated stickers. They are matching artwork sheets. If you crop a motif, you are cutting a region out of a finished page, not opening a dedicated cutout file.
Write a one-line use note in the working folder: consult board, personal idea book, apprentice practice print, or client preview. That note stops the same files from being used as a thermal stencil source on Monday and as a social graphic on Tuesday without a fresh review. Finished-project use is not the same as redistributing the raw pack. If more than one person will print from the files, keep one working copy and a short rule about who may export a crop.
- Unzip once, keep a locked master, and edit only a duplicate.
- Use JPG for a quick page print and PNG as the matching sheet, not as cutouts.
- Write the intended job on the working folder so the same files are not reused blindly.
- Follow the listed license: finished-project use is not the same as reselling the raw pack.
Treat each motif as a standalone patch, not a page composition
A flash sheet is a gallery. A patchwork limb is not. The page arranges several designs so they look finished together on paper. Skin does not have to copy that arrangement. If you tattoo the sheet as a block, you get a printed poster on an arm. If you treat each motif as its own patch, you get a collection that can grow. Circle the designs that can stand alone. Ignore the ones that only work because they sit next to a neighbor on the page.
Studios that collect this way usually describe the look as separate, unconnected designs with intentional negative space. Think of stickers on a jacket, not one mural. Every piece should still read if the neighboring piece is not there yet. That is why flash is a natural fit for patchwork: the designs were drawn to stand alone. Your job with a printable sheet is to recover that standalone quality after the motifs have been laid out as a gallery.
Write a short label next to each circled motif: possible anchor, possible filler, or not this canvas. An anchor is a larger, clearer shape that can hold a flat area such as the outer forearm, outer thigh, or upper arm. A filler is a smaller symbol that can sit in an awkward leftover space later. “Not this canvas” is just as useful. A design that needs a wide, still surface does not belong on a narrow, high-motion spot, even if it looks charming on the sheet.
- Circle motifs that still make sense if nothing sits beside them.
- Do not copy the sheet layout onto skin just because the page looks balanced.
- Label each candidate as an anchor, a filler, or a skip for this canvas.
- Keep the gallery page and the body plan as two different documents.
Pick one or two unifying threads before mixing sheets
Patchwork can mix subjects. It still needs a thread, or the grouping reads as a random sampler. You do not need every piece to match. You need one or two decisions that repeat. Common threads are a single ink palette, a consistent line weight, a shared theme family, or a repeated small motif. Fine-line sheets from this shop sit more naturally next to other fine-line sheets than next to a heavy color traditional page, unless you have already chosen contrast on purpose.
Make the thread visible on paper before you add a second pack. If this patchwork bundle is the lead pack, write the thread at the top of the consult board: all black, fine line throughout, mixed small botanicals and symbols, or another short rule you can actually keep. Then test a neighbor pack against that rule. A celestial sun-and-moon sheet, a witchcore botanical sheet, a gothic moth sheet, or a butterfly botanical sheet can join the board only if the line weight and ink density still sit beside the first patches without shouting over them.
Mixing styles can work when one variable stays still. If line weight stays fine, subjects can change. If the palette stays black, a slightly bolder silhouette can sit near a lighter botanical. What usually fails is changing subject, saturation, and size all at once in the same few inches. That is a consult problem, not a download problem. The sheets cannot decide the thread. You can, on paper, before anyone books a session.
- Choose one lead pack and write one or two threads at the top of the board.
- Test neighbor sheets against line weight and ink density, not only against theme names.
- Allow mixed subjects once a palette, line family, or repeated small motif is holding the group.
- Do not add a second pack until the first board still reads with skin between the patches.
Map placement and leave the skin gaps on purpose
Print or sketch a simple silhouette of the arm, leg, or other area you are planning, or use a photo of the actual limb. Place paper crops or rough outlines on that silhouette. The gaps are not empty leftovers. They are the part of the look that keeps each piece legible. If three large shapes sit so close that the leftover skin disappears, the collection stops being patchwork and starts being a crowded collage.
Think ahead about joints, clothing lines, and how the limb moves. A motif that looks centered on a flat print can wrap, pinch, or hide when the elbow bends or a sleeve rolls. Mark the elbow, wrist, knee, or hem line on the silhouette before you commit a favorite patch to that spot. Leave room for a future piece. A collection built over months, with pauses to see what is missing, usually reads more clearly than a plan that fills every gap in one sitting.
Do not treat this map as a medical or style guarantee. It is a paper rehearsal. A licensed tattooer still decides whether a line will hold, whether a gap is wide enough, and whether a placement is safe for that body. The map exists so you do not walk into that conversation with a full-page print and no idea where the skin should stay empty.
- Use a limb photo or paper silhouette, not only the original flash page.
- Place patches so leftover skin still reads as a gap, not as a mistake.
- Mark joints, clothing lines, and high-motion areas before assigning a favorite motif.
- Leave at least one open zone for a later piece instead of filling the canvas in one sitting.
Choose anchors first, then smaller fillers
A practical collecting order used across studios is simple: start with two or three larger, clearer pieces on relatively flat areas, then add smaller designs into the leftover spaces over time. The larger pieces set the tone. If the first patches are fine-line botanicals or small symbolic doodles with similar line weight, later fillers have a family to join. If the first patches are already a mix of heavy black and faint hairline work, later choices have less room to look intentional.
Use this sheet pack to nominate anchors, not to finish the entire limb on day one. Pick the two or three strongest standalone shapes. Print those at the size they would occupy on the real placement. Hold them on the limb or on the silhouette. Only after those anchors have a home should you look for tiny stars, small florals, or compact symbols that could sit in the corners. Fillers are not leftovers you dump in because the sheet still has unused drawings. They are the pieces that give the group rhythm once the anchors exist.
If a candidate only looks finished when it is still the size it appears on the full sheet, it is a page design, not yet a patch. Extra-small work often sits under about an inch. Many small flash pieces sit in a one-to-two-inch range. Those ranges are planning aids, not a promise the design will age well. Your licensed tattooer still decides the true size. The paper check exists so you do not treat a gallery-scale drawing as a filler just because it is printed on the same page as smaller neighbors.
- Nominate two or three anchors on flat areas before hunting for fillers.
- Print anchors at the size they would occupy on the real placement.
- Treat leftover sheet motifs as optional, not as a requirement to fill every gap.
- Use extra-small and small size ranges as planning aids, not as a guarantee.
Print a true-size consult board and check spacing
Do not print the whole sheet at “fit to page” and call the pack ready. Pick the circled anchors and one possible filler. Print each at the size it would occupy on the body, then tape or pin them onto the silhouette with the intended gaps still visible. Hold that board at arm’s length. If a line disappears, if two shapes collide, or if the group only works when you squint, the plan is not ready. Fix the paper plan before anyone talks about stencil paper.
Print on ordinary paper first. Use 100 percent scale if the software offers it, or measure the printed motif with a ruler and compare it to the intended placement. If the printer shrunk the page to fit margins, the test is lying. Mark each print with the date, the motif you cropped, the measured width, and whether it is an anchor or a filler. Keep those marked pages in the working folder. One honest consult board is more useful than three decorative sheets you never held against skin.
Check readability the same way you would check a single tiny design, then add the spacing check that patchwork needs. A line that holds at one inch can still fail when three such pieces sit a finger-width apart and compete. Look for colliding outer contours, matching line weights that blur into one texture, and gaps so tight that the eye no longer reads separate patches. Adjust one variable at a time: size, then gap, then which filler you keep.
- Print candidate motifs at true size, not at full-page display size.
- Assemble them on a silhouette with the intended skin gaps still showing.
- Measure widths with a ruler and keep the marked prints.
- Change size, gap, or filler choice one at a time when a board fails the arm’s-length check.
Crop a motif from a sheet without expecting cutouts
When you need one design off a page, crop it from the working copy. Use the PNG sheet if your editing app handles PNG more cleanly, or crop from the JPG if you are only making a paper print. You are cutting a rectangle out of finished artwork. You may pick up neighboring lines, paper texture, or background from the sheet. That is expected. It is not a defect in a listing that never promised isolated transparent files.
If the crop includes a neighbor you do not want, reprint and crop tighter, or skip that motif for this board. Do not spend an hour trying to extract a perfect sticker. That workflow belongs to a pack that lists individual transparent PNG crops. Neighboring SteadyStackStudio flash libraries describe that file type when they include it. This patchwork listing does not. Forcing the sheet to behave like a cutout library usually damages edges and wastes time.
Name cropped files so you can find them later: motif idea, approximate size, and date. Keep crops inside the working folder, not mixed into the master. If you later add a celestial, moth, or botanical sheet to the same board, store those crops in clearly named subfolders so the consult set does not become a pile of untitled screenshots.
- Crop from the working PNG or JPG sheet; do not edit the master.
- Accept that a crop is a region of a finished page, not a dedicated cutout.
- Skip a motif rather than fighting a messy neighbor on the same sheet.
- Name and file each crop so the consult board can be rebuilt.
Keep artwork choice separate from stencil, consent, and skin work
A printable flash sheet is a reference. It is not a stencil, a consent form, or a placement decision. Keep those jobs in separate piles. The consult board answers “which patches are we discussing, at roughly which size, with which gaps.” A licensed professional still reviews the artwork, redraws or adapts what will actually go on skin, prepares a stencil with the materials they trust, and follows the intake and aftercare process their studio uses.
Do not hand a client or a collector a cropped JPG and call it ready to transfer. Printer ink, office paper, and a phone screenshot are not a professional stencil system. If someone wants to practice drawing from the sheet, that is a paper exercise. If someone wants the design on skin, the next conversation is with the person who will be responsible for the tattoo. The download cannot make that decision, and this guide does not provide medical, licensing, or technique instruction.
The same boundary applies to client paperwork. Flash choice, intake, consent, payment, and aftercare are different records. Do not write private client details on the artwork print. Keep the consult board in the art workspace. Keep forms in the paperwork workspace. If you are planning your own collection, you can mark the board with placement notes and still wait for a professional review before treating any crop as final.
- Use the sheets for browsing, printing, and consult discussion only.
- Leave stencil preparation, placement, and tattooing to a licensed professional.
- Do not treat a paper crop or screenshot as a ready transfer.
- Keep artwork notes separate from intake, consent, and aftercare records.
Choose this sheet pack, a large PNG library, or a narrower motif pack
Stay with this patchwork sheet bundle when you want a small, mixed-motif gallery you can print as pages and cut into a collage plan. Three JPG sheets and three matching PNG sheets are enough to start a consult board. They are not a lifetime inventory. That is useful when the job is to rehearse spacing and mixing, not to stock a flash-day menu.
Choose the larger tiny fine-line library when you need many separate designs, including individual transparent PNG files, for a coded flash-day menu or for dragging one isolated motif onto a mockup. That pack is a different tool. It solves volume and cutout workflow. It does not automatically teach patchwork spacing. You can still use this guide’s board method with motifs from a larger library, as long as you keep treating each design as a standalone patch.
Choose a narrower motif pack when one family should lead the collection. Celestial sun-and-moon sheets, witchcore botanicals, gothic moth pages, or butterfly botanicals each hold a tighter visual world. They pair with this patchwork bundle when you want extra candidates inside a thread you already chose. They are a poor first purchase if you still do not know whether you are building mixed patches or one connected scene. Buy the pack that matches the next job, not the pack with the longest file list.
- Use this bundle for a short mixed-motif consult board built from finished sheets.
- Use a large individual-PNG library when you need many isolated files or a flash-day menu.
- Use a narrower motif pack when one visual family should lead.
- Do not stack packs until the first board has anchors, gaps, and a written thread.
Watch for setup mistakes that crowd a limb or waste a print
The most common waste is printing the gallery at page size and assuming the body will look the same. It will not. The second is filling every gap because unused skin feels unfinished. Patchwork needs that unfinished feeling. If you close every gap on paper, you have designed a different tattoo. The third is mixing a faint fine-line doodle with a dense black shape in the same few inches without a thread that can hold both.
Other failures are quieter. Cropping a motif and calling the leftover background “transparency.” Sending a screenshot to a studio and expecting it to replace a professional stencil. Adding a second theme pack because the first board still has empty paper, not because the limb still has a planned open zone. Writing client names on the artwork print. Assuming the word stencil in a product title means a thermal transfer is included.
Catch those mistakes on the consult board. If a print is the wrong size, reprint one motif. If two patches collide, widen the gap or drop a filler. If a crop includes a neighbor, skip that design for this round. One corrected board is cheaper than a stack of full-sheet reprints you never hold against a real arm.
- Do not treat a full-page gallery print as a body plan.
- Do not fill every gap just because the sheet still has unused drawings.
- Do not assume a PNG sheet is a cutout, or that a screenshot is a stencil.
- Correct size, gap, and crop on paper before printing the whole pack again.
When this download may not be the right fit
Skip this pack if you need individual transparent files, SVG vectors, a compiled printable PDF, or a physical item in the mail. Skip it if you want one large connected sleeve with backgrounds and no leftover skin. Skip it if the real job is a flash-day menu with stable choice codes pulled from more than a hundred separate designs. Those jobs have neighboring downloads or a custom drawing process. This listing does not claim to be all of them.
It is also the wrong first file if you have not yet decided the canvas. A patchwork board for a forearm is not interchangeable with a finger-scale plan or a back-piece sketch. If the placement is a finger or the side of a hand, a tiny-hand sheet pack and a true-size finger print are the better first check. If the placement is still “somewhere,” do not buy a mixed sheet set in the hope that a gallery will choose the body area for you.
The pack can still be useful as a personal idea book even when you are not ready to collect. Print a page, circle what you like, and leave it in a folder. That is a legitimate use of finished artwork sheets. It is not a reason to treat the files as a competing digital product you can resell or share. If the README and the listing’s usage note do not match the way you want to publish the art, do not force a fit.
- Choose a different pack when you need cutouts, vectors, a PDF packet, or a shipped print.
- Choose a custom or connected-sleeve process when leftover skin is not part of the look.
- Choose a finger-scale sheet workflow when the canvas is a hand or finger, not a limb collage.
- Use this pack as an idea book only if that matches the listed files and license.
Before you click through to Etsy
You are ready to open the listing when you can describe the next job in one sentence: print mixed-motif flash pages, circle standalone patches, leave skin gaps, and build a true-size consult board. You know the ZIP should contain three JPG sheets, three matching PNG sheets, and a README. You are not expecting individual cutouts, a PDF, a vector set, or a stencil in the mail. You have a limb or silhouette in mind, and you know a licensed professional still has to review anything that might go on skin.
If that sentence is still “I need as many tiny designs as possible,” look at the larger fine-line library instead. If the sentence is “I need one botanical family,” look at moth, butterfly, witchcore, or celestial sheets. If the sentence is “I need file-format help for any flash pack,” use the companion printable flash-sheet setup first. Buy one lead pack, set up the board, and add a neighbor only when a real gap appears.
After checkout, run the same short sequence: unzip, lock the master, duplicate a working folder, circle standalone motifs, print two or three anchors at true size, place them with gaps on a silhouette, and stop. That is a complete first use of this download. Everything else — fillers, a second theme pack, a studio conversation — can wait until the paper plan still reads at arm’s length.
- Confirm the listed three JPG sheets, three PNG sheets, and README before you buy.
- Name the canvas and the thread, not only the aesthetic you liked in a thumbnail.
- Plan for professional review; do not treat the download as a ready-to-tattoo stencil.
- Set up one consult board fully before adding another flash pack.
Printables used in this guide
Instant downloads from the SteadyStackStudio Etsy shop.
Patchwork Tattoo Flash Sheet Bundle
I built this patchwork tattoo flash sheet bundle for studios that need ready-to-print mixed motifs for flash-day walls without…
Fine Line Tattoo Flash Sheet Bundle
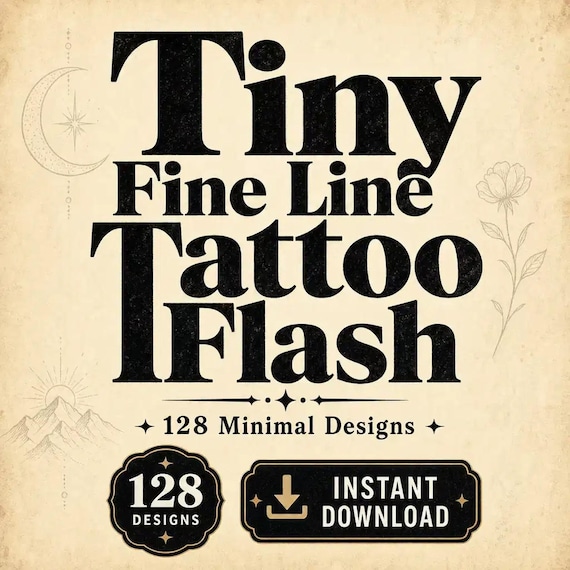
Tiny Fine Line Tattoo Flash Bundle — 128 minimal designs in one instant-download pack. A practical gift for a tattoo artist or…
Sun and Moon Tattoo Flash Sheet
I built these celestial sun and moon tattoo flash sheets for fine-line studios that need ready-to-print star and cosmic motifs…
Witchcore Tattoo Flash Sheet
I built these witchcore botanical tattoo flash sheets for fine-line artists who need ready-to-print moon and floral motifs…