Caregiver & Just in Case · Jul 31, 2026 · 14 min read
Home Maintenance Binder Setup: Schedule Tasks, Log Repairs, and Track Warranties
A practical way to organize seasonal tasks, repair history, appliance details, warranties, service contacts, finishes, and home projects without creating several competing records.
Confirm what the current home maintenance binder includes
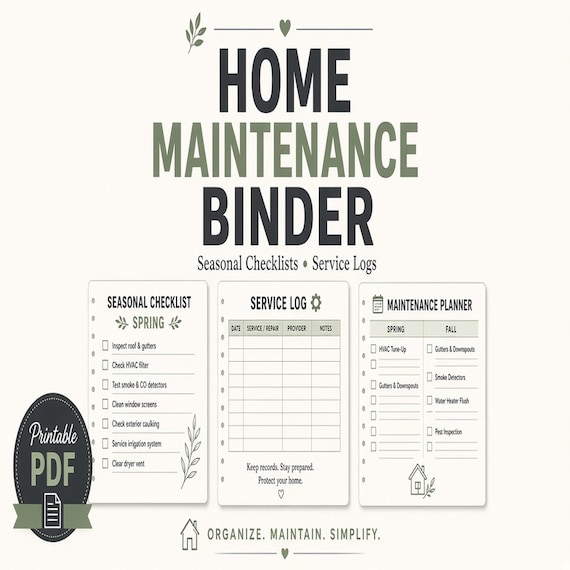
A home maintenance binder is useful when the problem is scattered repair texts, forgotten service dates, missing appliance details, and receipts that cannot be found when something needs attention. The featured SteadyStackStudio download is currently described as printable PDF organizer pages, an editable Microsoft Word file, a Quick Start PDF, and a README/license note. It is an instant digital download; no printed binder, tabs, tools, repairs, or physical supplies are shipped. Before checkout, review the current previews, file list, software fit, page size, editing needs, and license against the way the household will actually maintain the file.
The listed sections are Start Here, Home Snapshot, Utility Directory, Repair Log, Seasonal Maintenance Checklist, Appliance Record, Warranty Tracker, Contractor/Pro Directory, Paint and Finish Log, Project Planning Sheet, Home Inventory Snapshot, and Update Log. That makes the download a house-records organizer, not a set of repair instructions. It can help you remember what happened, where supporting documents are stored, and what needs follow-up. It cannot diagnose a building problem, establish a safe maintenance interval, authorize work, prove warranty or insurance coverage, or replace a qualified contractor, property manager, manufacturer, utility provider, insurer, emergency service, or local requirement.
- Expect PDF and editable Word files, not a physical home binder.
- Use the pages to organize tasks and records rather than to invent technical instructions.
- Confirm the current previews and included formats before relying on a page or feature.
- Keep safety, repair, warranty, insurance, lease, and permit decisions with the responsible source.
Define the home and the record boundary before filling pages
Decide which property the binder covers and who is responsible for maintaining the current copy. A primary residence, rental, vacation property, inherited home, or shared household may have different contacts and responsibilities. Write a plain property label on the working copy and keep records for unrelated addresses outside it. If the same person maintains more than one home, use a separate binder or clearly separate file for each address so an appliance, repair, paint color, or service visit cannot be attached to the wrong property.
Also separate observation from authority. A homeowner may arrange some work directly, while a renter may need to report an issue and keep the request history rather than authorize a repair. A shared household may have one person who schedules service and another who stores receipts. The binder can record those roles, but it does not change a lease, ownership right, warranty term, property-management process, or local rule. Choose one current master, name the person who updates it, and use the Update Log when that responsibility or the property status changes.
- Use one unmistakable property label and address boundary per working binder.
- Name the person who maintains the current master without assuming that person may authorize every task.
- Keep owner, renter, manager, household, and service-provider responsibilities distinct.
- Start a separate file when two properties would otherwise share look-alike records.
Build the home snapshot and utility directory as a navigation page
Use the Home Snapshot to identify the property and point to the records that matter most often. Keep it short enough to scan. A useful snapshot can name the property, the current binder owner, the last review date, and the locations of fuller records such as appliance manuals, project files, or approved household documents. Do not crowd the first page with every serial number, receipt, access code, or account detail. Its job is to guide an authorized reader to the right section, not to expose the entire household file at once.
Use the Utility Directory to record each provider's current name, the service or property it belongs to, an official contact route, and the date the entry was checked. Add a partial account reference only when it is genuinely needed and appropriate for the binder's access level. Keep passwords, security answers, full payment details, and alarm or access codes elsewhere. A directory should never tell an untrained person to operate electrical, gas, water, heating, cooling, or other equipment. For an outage, leak, hazard, or urgent condition, follow the current instructions from the utility, manufacturer, property manager, qualified professional, and local emergency authorities.
- Let the front page point to records instead of duplicating every detail.
- Label each utility by provider, service, property, official contact route, and checked date.
- Keep credentials, payment data, and access codes out of an ordinary household directory.
- Use official and qualified guidance for utility operation, hazards, and urgent situations.
Turn the seasonal checklist into a source-based schedule
A seasonal maintenance page works best as a schedule for verified tasks, not a universal list copied from another house. Homes differ by climate, building type, equipment, lease terms, materials, age, and local requirements. Start with the manuals, service records, property documents, qualified recommendations, and official instructions that apply to the actual home. For each task, record what is being checked or serviced, the source of the instruction, the appropriate season or due window, the last completed date, the next review point, and the person responsible for arranging it.
Keep the task wording specific enough to act on without turning it into unqualified repair advice. “Review the manufacturer maintenance instructions for the named appliance” is safer and more durable than a vague reminder to “service everything.” Group tasks by the time they need attention, then keep completed work in the history rather than deleting it. If a task is not applicable, mark it that way with a reason instead of leaving a blank that looks forgotten. When equipment is replaced or the household moves, retire the old schedule and build the new one from the current sources.
- Build each recurring task from a source that applies to the actual home or equipment.
- Record the due window, last completion, next review, responsible person, and source location.
- Mark tasks as not applicable when appropriate instead of leaving unexplained blanks.
- Replace schedules after equipment, occupancy, property, or official instructions change.
Use the repair log from first observation through closeout
A useful repair entry starts with what was actually observed: the date, room or area, affected item, visible or audible problem, and who noticed it. Use neutral facts rather than a diagnosis you are not qualified to make. Add photos or supporting files to an approved folder and point to that location from the log. If the issue is reported to a landlord, property manager, warranty provider, insurer, utility, or contractor, record the official contact route, reference number when appropriate, date sent, response, and next follow-up.
Keep one status sequence that the household can understand, such as observed, reported, assessment scheduled, work authorized, work completed, and monitor. Do not mark an item complete merely because a visit happened. Record the completion date, who performed the work, the invoice or service-record location, any written follow-up supplied by the responsible provider, and the next action if one remains. The log should preserve the history without becoming a substitute for a contract, inspection, safety decision, or technical record. If the condition could be urgent or hazardous, stop using the organizer as the next step and contact the appropriate qualified or emergency source.
- Record the observable issue, location, date, reporter, and supporting-file location.
- Track official contacts, reference numbers, appointments, responses, and the next follow-up.
- Close the entry only after the outcome and supporting record are clear.
- Escalate possible hazards through the appropriate qualified or emergency channel rather than diagnosing them in the binder.
Create an appliance record that leads back to the real source
The Appliance Record can save time when a manual, part reference, service history, or purchase document is needed. Work from the appliance label and current paperwork rather than memory. Record the appliance type, room or location, manufacturer, model, serial number when appropriate, purchase or installation date if known, and the approved locations of the manual, receipt, and service records. Add the date each entry was checked so a replacement appliance is not confused with the one it replaced.
Keep service and maintenance instructions connected to the manufacturer or qualified provider that issued them. The binder can point to the current manual and show when a service visit occurred, but it should not rewrite electrical, gas, plumbing, refrigerant, ventilation, or other technical instructions. When an appliance leaves the home, mark the record retired and preserve only the history the household has a reason to keep. Create a fresh entry for the replacement rather than overwriting identifiers and making an older invoice appear to belong to a newer unit.
- Copy model and serial details from the actual label or current record.
- Point to manuals, receipts, installation papers, and service history instead of scattering copies.
- Keep technical maintenance guidance tied to the manufacturer or qualified provider.
- Retire the old appliance entry and create a new one when equipment is replaced.
Track warranties from the written terms, not assumptions
Use the Warranty Tracker to map the product or project to the written warranty, proof of purchase, registration confirmation when one exists, provider contact route, and any dates shown in the actual terms. Do not calculate a coverage end date from memory if the document uses conditions you have not reviewed. A store receipt, manufacturer warranty, installer workmanship promise, service plan, credit-card benefit, and home warranty may be separate arrangements with different contacts and requirements. Keep each one attached to the correct item and source.
When a claim or service request begins, record the date, official channel, reference number, requested documents, response, appointment, and outcome. Save claim emails, estimates, invoices, and completion records in the approved location. The printable tracker does not prove that a claim is covered, extend a deadline, override exclusions, or replace the provider's terms. Confirm eligibility, required maintenance, transfer rules, and documentation directly with the responsible organization. Close the entry only when the household can see what was decided and where the final record lives.
- Link each warranty entry to the exact product, project, receipt, and written terms.
- Keep separate coverage arrangements separate even when they concern the same item.
- Record claim dates, official contacts, references, requested documents, and outcomes.
- Use the responsible provider's current terms to confirm coverage and deadlines.
Make the contractor and pro directory a history, not an endorsement
The Contractor and Pro Directory should answer who was contacted, for which property and task, when the contact was current, and where the related estimate, agreement, invoice, or service record is stored. Add the trade or service category and the exact job completed so a future household member does not have to recognize a business name from memory. Keep quote comparisons, approvals, payments, and project records with the matching job rather than turning the directory into one long notes field.
A past entry is not proof that a person or company is currently available, qualified, insured, licensed, authorized, or suitable for another project. Recheck the requirements and credentials that apply to the location and work at the time service is needed. Record factual experience, such as the completion date and the equipment serviced, instead of unsupported labels. Protect gate codes, lockbox details, payment credentials, and other access information separately. When contact information changes or a provider should no longer be used, retain any necessary project history but mark the active directory status clearly.
- Tie each provider to a property, service category, exact job, date, and supporting records.
- Recheck current qualifications and requirements instead of treating an old entry as approval.
- Keep access codes and payment credentials outside the ordinary directory.
- Distinguish historical project records from the active contact list.
Use the paint and finish log to make matching repeatable
Paint and finish details are easy to lose because the useful information may be spread across a can label, receipt, photo, sample card, contractor invoice, and leftover container. For each entry, identify the property, room or area, exact surface, brand or maker, product line, color name or code, finish or sheen, application date when known, and the approved location of the receipt, sample, or leftover material. Photograph labels while they are readable and connect the image to the same entry.
Keep similar-looking finishes separate. Wall paint, trim paint, cabinetry, exterior coating, flooring, tile, grout, countertop, stain, and sealant may need different records even within one room. Do not assume a screen image or color name will reproduce the existing result. Confirm compatibility, preparation, quantity, ventilation, application, disposal, and safety instructions with the current manufacturer, retailer, qualified professional, and local requirements. If a later repair uses a different product or batch, add a dated note rather than changing the original entry and erasing the history.
- Label the exact room, area, and surface before recording the finish details.
- Save the product line, color code, sheen, date, and source-image or receipt location.
- Keep different surfaces and materials in separate entries even when the colors look alike.
- Verify product and application details before using an old record for a new job.
Turn the project planning sheet into a decision and document trail
Use the Project Planning Sheet to define one project before collecting products and quotes. Name the room or system, the problem to solve, what is included, what is excluded, the desired result, dependencies, access needs, decision owner, and documents that must be checked. Separate must-do work from optional improvements so a growing wish list does not hide the original need. Keep estimates labeled by provider and date, and point to the complete written document rather than copying only a total into the binder.
As the project moves forward, record approvals, selected scope, scheduled dates, changes, completion evidence, final documents, and unresolved follow-up. A planning page is not a permit, contract, design, engineering instruction, lease approval, inspection, or budget guarantee. Confirm those needs through the proper owner, manager, contractor, designer, engineer, authority, lender, insurer, or other responsible source. After completion, move appliance details, warranties, paint or finish information, and service history into their permanent sections so the project sheet does not become the only place the finished home's records can be found.
- Define the problem, scope, exclusions, result, dependencies, and decision owner first.
- Keep every estimate attached to its provider, date, and complete written source.
- Record approved changes and unresolved follow-up instead of silently replacing the original plan.
- Move final appliance, warranty, finish, and service details into the lasting household records.
Keep the home inventory snapshot useful without overstating it
The Home Inventory Snapshot can give the household a high-level map of rooms, major items, supporting photos, purchase records, and document locations. Decide what the snapshot is meant to support before recording everything. A simple room-by-room index may be enough to help with maintenance and moving. A landlord, insurer, estate, tax, business, or accessibility purpose may require different records and professional guidance. Use current photos and factual descriptions, then record where fuller evidence is stored and when the snapshot was last reviewed.
Do not assume the printable page establishes ownership, value, condition, coverage, reimbursement, or an acceptable claim record. Ask the responsible insurer or professional what documentation is needed for the actual purpose. Keep serial numbers, receipts, photographs, and valuations at an access level suited to their sensitivity. When an item is sold, donated, moved, replaced, or substantially changed, update the snapshot and preserve any history the household is required or has a clear reason to retain. The goal is a findable index, not an unsecured catalog of everything in the home.
- Choose the purpose and level of detail before inventorying every room.
- Use factual descriptions, current photos, supporting-record locations, and review dates.
- Confirm insurance, valuation, ownership, and documentation needs with the responsible source.
- Protect detailed household records and update the index when items change.
Choose PDF or Word and declare one current master
Use the printable PDF when handwriting is comfortable, the fixed layout is easy to scan, and a paper binder is the most dependable method for the household. Use the editable Word file when typed entries, revised labels, or replacing individual pages will make updates easier. The current listing describes both formats, so the binder can use a deliberate combination, such as printed reference pages with typed project or appliance records. Test one representative page before completing the whole file. Check margins, text size, writing room, page breaks, and whether the person maintaining it can update the page without damaging the layout.
Archive the purchased files unchanged, then create a dated working copy. Decide whether paper or digital is the master and write that choice on the front page. If both circulate, explain how the secondary copy is replaced after an update. Store the finished record according to the sensitivity of its contacts, property details, serial numbers, receipts, photos, and document locations. Use appropriate access controls and backups for the chosen device or service, and keep passwords and recovery secrets outside the binder. Several convenient copies are not helpful if nobody can tell which one is current.
- Choose PDF for stable printing and handwriting or Word for typed, replaceable pages.
- Archive the original download and work from a clearly dated copy.
- Name one paper or digital version as the current master.
- Protect property records and backups without placing credentials in the organizer.
Run a five-record find test and choose the smallest organizer that fits
Test the working binder with an authorized household member or use nonsensitive sample entries when the reviewer should not see the real records. Ask the person to find five things without coaching: the current utility provider contact, one repair history, an appliance manual, the proof connected to a warranty, and the paint or finish record for one room. Watch for vague labels, duplicate versions, dead file paths, old phone numbers, crossed properties, and entries with no review date. Correct those problems before adding more sections.
Choose the featured Home Maintenance Binder when the main job is keeping seasonal tasks, repairs, appliances, warranties, pros, finishes, projects, and a home inventory snapshot together in PDF and editable Word form. Choose the Important Documents Organizer when the bigger gap is a map for IDs, certificates, policies, property papers, and other household records; the Moving Planner for address changes, packing, utilities, and move-day tasks; or the Family Emergency Binder for a quick-reference household handoff. Choose the Complete Life Admin Binder only when several distinct organizer jobs are genuinely needed. Compare the current previews and included files, then select the smallest complete system the household can keep current.
- Test five different record paths with a person who may actually use the binder.
- Fix unclear labels, stale contacts, crossed properties, broken locations, and duplicate masters.
- Use the home maintenance file for ongoing house tasks and records, not every life-admin job.
- Confirm the current product details before checkout and avoid overlapping organizers without a clear role for each.
Printables used in this guide
Instant downloads from the SteadyStackStudio Etsy shop.
Home Maintenance Binder Printable
A practical home maintenance checklist for homeowners and renters who want repairs, warranties, utilities, and service contacts…
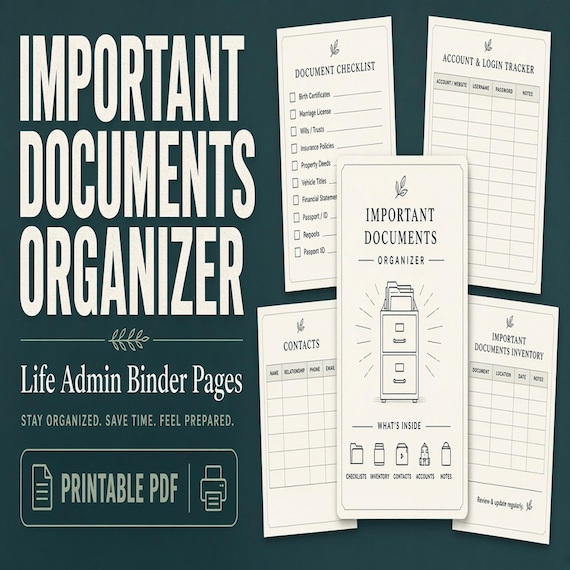
Important Documents Organizer
A practical important documents organizer for busy households that need one map for IDs, certificates, policies, records, and…
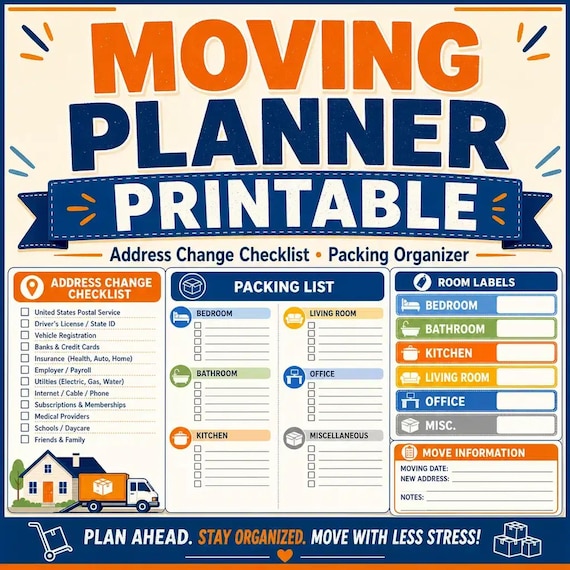
Moving Planner Printable
A practical moving checklist printable for people planning a move who need a simple checklist for packing, address changes…
Family Emergency Binder Printable
Family emergency binder for households: 28-page fillable PDF with household profile, emergency contacts, medical info pages…