
Planners & Trackers · Jul 13, 2026 · 11 min read
Seed Starting Spreadsheet Setup: Plan Sowing Dates, Track Germination, and Prepare Transplants
Set up a seed-starting spreadsheet around your own frost dates, packet directions, tray labels, actual germination, hardening, transplanting, succession sowing, and end-of-season notes so each batch has a clear next step.
Choose the planning job before you choose the file
A seed-starting spreadsheet is most useful when it answers a small set of recurring questions: what should be sown, when should it be started, where is the batch now, what actually happened, and what needs attention next. Begin by naming the parts of the season that are currently hard to manage. One gardener may need a simple seed inventory and sowing calendar. Another may be losing track of tray locations, pot-up dates, or succession batches. A small nursery starter may also need purchase and harvest records. The right download should match the work you will maintain, not merely contain the largest number of pages.
Write a short must-have list before looking at previews. Separate planning fields from observation fields: a target sowing date is a plan, while the actual sowing and emergence dates are records. Also decide whether you want one seasonal workbook or a focused tracker for only a few crops. If you are unlikely to update an elaborate system every week, choose a smaller routine and leave optional pages unused. A clear, repeatable record is more valuable than a complete-looking planner that stops after the first tray is planted.
- List the three garden decisions you most often forget or repeat.
- Separate target dates from actual dates before entering any seed data.
- Choose a level of detail you can maintain during busy planting weeks.
- Treat optional pages as tools, not assignments that all must be completed.
Anchor sowing windows to local information, not a generic calendar
Start with your own current frost dates, climate context, and growing conditions from a trusted local source. Enter those dates as planning anchors, then read each seed packet or supplier instruction for the specific variety. A generic calendar can suggest a sequence, but it cannot account for every microclimate, season, packet, soil condition, or weather shift. Keep the source and date of the local information beside the plan so you know what to recheck next season instead of treating an old entry as permanent advice.
Copy packet directions carefully and preserve their wording when the distinction matters. Note whether the crop is commonly started indoors or sown directly, how the packet describes timing, and what conditions it calls for. If a packet lists a number of days, record what that number refers to rather than assuming it begins at sowing. Keep target windows flexible until the real forecast and garden conditions support the next step. A frost date is an organizing reference, not a promise that one calendar day will be safe for every plant.
- Enter locally relevant frost information and record where it came from.
- Use current packet directions for the exact crop and variety.
- Label timing as a window when conditions may change the final date.
- Recheck weather, soil, and local guidance before moving seedlings outside.
Build a seed inventory that keeps varieties separate
Use one inventory row for each variety rather than combining every tomato, lettuce, or flower into a single crop name. Variety-level records make it possible to connect a packet with its sowing batch and later results. Useful details can include the crop, variety, packet source, season purchased, amount remaining, storage location, indoor-start or direct-sow plan, and a short reference to the packet instructions. Add only fields you will use; an inventory should help you find and choose seeds, not become a second hobby.
Keep the original packet until the batch is finished, even after its information has been entered. The packet remains the direct source for details that may not fit neatly in a spreadsheet. When seed is carried into another season, create a fresh status check rather than silently changing the old record. Mark packets as unopened, open, low, finished, or set aside using terms that are obvious to you. If you buy the same variety from a different source or season, give it a separate lot or batch note so results do not become mixed.
- Create one row per variety and packet source when the distinction matters.
- Record storage and quantity status in simple, consistent terms.
- Keep packet directions available instead of relying on a shortened transcription.
- Separate new purchases from older seed so observations remain traceable.
Turn each planting window into a sequence of dated actions
A calendar becomes easier to use when one planned window leads to a visible chain of actions. For an indoor-started batch, that chain may include preparing supplies, sowing, checking emergence, thinning if appropriate, moving to a larger container, beginning gradual outdoor adjustment, and transplanting when conditions are suitable. A direct-sown batch will have a different sequence. Keep the workflow tied to the packet and local guidance rather than forcing every crop through identical steps.
Give every action both a target and an actual field when the difference will teach you something. Targets help you prepare; actual dates preserve the season as it happened. Add a short status such as planned, sown, waiting, ready to review, moved, complete, or stopped. Avoid filling distant dates with false precision. It is better to set a review window and confirm conditions later than to treat an early estimate as a fixed appointment. If a batch is delayed, change its next review point and keep the original plan visible for comparison.
- Create different action sequences for indoor-started and direct-sown crops.
- Keep target and actual dates in separate fields.
- Use a small status list so the next action can be scanned quickly.
- Move review dates when conditions change without erasing the original plan.
Give every tray, row, and resown batch a traceable label
A tray map only works when the physical labels and spreadsheet use the same names. Create a short batch ID that can fit on a plant marker and in a row, then connect it with the crop, variety, sowing date, and tray or bed location. The exact code matters less than consistency. For example, a readable abbreviation followed by a batch number is often easier to maintain than a long description. Test the label on the material and marker you actually use, because a perfect spreadsheet cannot recover a label that fades or separates from the tray.
Treat a resowing as a new batch rather than overwriting the first attempt. That preserves what happened and prevents two different sowing dates from sharing one record. If seedlings move to a new tray, larger container, cold frame, or garden row, update the location while retaining the batch ID. A current location field and a brief movement note are usually more useful than a long diary. At each weekly review, compare the digital map with the physical trays and correct mismatches before they multiply.
- Use the same short batch ID on the marker, tray map, and spreadsheet row.
- Create a new batch record for every resowing.
- Update the location when seedlings move while keeping the batch identity.
- Reconcile the map with the physical growing area once a week.
Record germination as an observation, not a guarantee
For each batch, record the number sown when it is known, the date sown, the first date you observe emergence, the number that emerge, and the date you decide the observation window is complete. Add only conditions you can record consistently, such as the medium or location, rather than guessing at measurements you did not take. This creates a practical history for comparing your own batches without turning a small difference into a sweeping conclusion.
Do not edit a disappointing result into a cleaner number. Note whether the batch was resown, stopped, or continued with fewer seedlings. Seed age, storage, moisture, temperature, variety, handling, and other conditions can affect results, so a tracker should preserve context without claiming one cause. One season is evidence for your next decision, not a promise about future germination or yield. Follow packet directions and trusted local guidance when deciding whether to wait, resow, or change the setup.
- Record what was sown, what emerged, and when each observation was made.
- Use a clear final-check date instead of changing results indefinitely.
- Keep failed or partial batches in the history and mark their outcome.
- Avoid assigning a cause unless you have enough information to support it.
Separate pot-up, hardening, and transplant decisions
Potting up, gradually introducing seedlings to outdoor conditions, and transplanting into the garden are related but separate decisions. Give each its own target, readiness check, actual date, and note. A seedling can outgrow a container before outdoor conditions are suitable, or the weather can delay transplanting after the adjustment process has begun. When all three steps share one date field, the record cannot explain where a delay occurred or what should happen next.
Use a gradual hardening process appropriate to the plant and current guidance rather than moving protected seedlings directly into full outdoor exposure. Record the start of the process and any pause caused by wind, sun, cold, or another condition. Before transplanting, check the forecast, soil and site conditions, plant readiness, and crop-specific directions again. If the move is postponed, keep the batch in a waiting status and set a new review point. The spreadsheet organizes observations and decisions; it does not replace hands-on checks.
- Track pot-up, hardening, and transplanting as separate events.
- Record readiness and conditions, not only a scheduled date.
- Pause or extend the process when current conditions require it.
- Use a new review point when transplanting is delayed.
Manage succession sowing as a queue
Succession sowing is easier to maintain when each planned batch has a next review date and a reason for being in the sequence. Start with the crops you actually want to repeat, then note the intended interval or trigger from an appropriate source, available growing space, and the point when additional sowing should stop. Avoid copying a long generic schedule into the workbook before checking whether your household, garden, or market can use the result.
At each review, look at the current batch before starting the next one. Record whether the next sowing proceeds, moves, shrinks, or is canceled because of weather, space, plant performance, travel, or harvest capacity. Keep canceled batches visible so the season still makes sense later. If a crop has several overlapping batches, use the same variety name with different batch IDs and sowing dates. The goal is a controlled queue with a visible next action, not an endless set of reminders.
- Choose only the crops that genuinely need repeated sowing.
- Give each future batch a trigger, review date, and stopping point.
- Check space and the current batch before beginning another one.
- Keep moved or canceled batches in the record with a short reason.
Use one short weekly review to keep the tracker trustworthy
Choose a regular time to review the seed-starting system while the physical evidence is still easy to see. Walk the trays, containers, beds, and stored packets first, then update the spreadsheet. Check new emergence, tray moves, batches that need a decision, upcoming sowing windows, hardening progress, transplant readiness, and supplies that are becoming low. A quick observation-led review is more reliable than trying to reconstruct several weeks from memory.
End the review with a small action list for the next few days. Assign each task to a batch and include a review date when it cannot be completed yet. Archive or filter completed batches so the active view remains readable, but do not delete the history needed for end-of-season comparison. If the review repeatedly takes too long, remove fields that do not change decisions. The system should reduce mental load during the season, not create another backlog.
- Inspect the physical growing area before updating the digital record.
- Review waiting batches and upcoming windows before adding new tasks.
- Keep the active view short while preserving completed history.
- Remove fields that consume time without changing a decision.
Close the season with notes that improve the next plan
At the end of a crop or season, compare the original plan with the actual sequence. Note which sowing windows were practical, which varieties you want to repeat, where labels or tray locations became confusing, and which stages were consistently early or late in your conditions. Record harvest observations only at the level you can maintain and interpret. The purpose is not to prove that the season followed the calendar; it is to make next year's first draft more realistic.
Preserve uncertainty. A good result may reflect several conditions, and a poor result does not automatically identify one cause. Keep weather disruptions, travel, pests, space limits, and changes in care visible when they affected the record. Duplicate the clean workbook for the next season while retaining the completed copy as read-only reference. Update local dates and packet information before reusing old targets. Carry forward only the fields and routines that helped you choose the next action.
- Compare planned and actual dates without erasing either one.
- Record useful context while avoiding unsupported conclusions.
- Keep the completed season as a reference copy.
- Refresh local information and packet details before planning again.
Check the included formats and page previews before purchase
The featured listing currently describes a 22-page seed-starting and planting workbook, an editable Word version, and an Excel workbook with seed inventory, variety, sowing, tray, germination, transplant, succession, harvest, and purchase trackers. It also lists frost-date, tray-map, pot-up, hardening, direct-sow, and end-of-season pages. The US Letter PDF is described for printing or digital annotation, and the files are packaged in a ZIP folder. No physical item is shipped. Confirm the current listing, included files, software needs, and preview images before checkout because the product page is the final source for what is included.
Choose the format by the maintenance task. PDF pages can work for a stable printed binder or permitted annotation. Word can help when you need to customize approved headings or fields. Excel can suit repeated rows, filters, and ongoing records when you are comfortable maintaining a spreadsheet. Keep the original files unchanged, make a working copy, and test a sample page or row before entering the full inventory. The listing says the first image is a styled presentation and the remaining images are direct page previews, so inspect those inside pages for readable labels, suitable fields, and a workflow you can realistically update.
- Confirm the current page count, file types, ZIP delivery, and software needs.
- Inspect the direct page previews rather than judging only the cover image.
- Choose PDF, Word, or Excel according to how the record will be maintained.
- Use the workbook as a planning and recordkeeping aid, not a guarantee of germination, plant health, timing, or yield.
Printables used in this guide
Instant downloads from the SteadyStackStudio Etsy shop.
Seed Starting Spreadsheet
Seed starting spreadsheet for home gardeners: Excel-first workbook with seed inventory, planting calendar, germination log (auto…
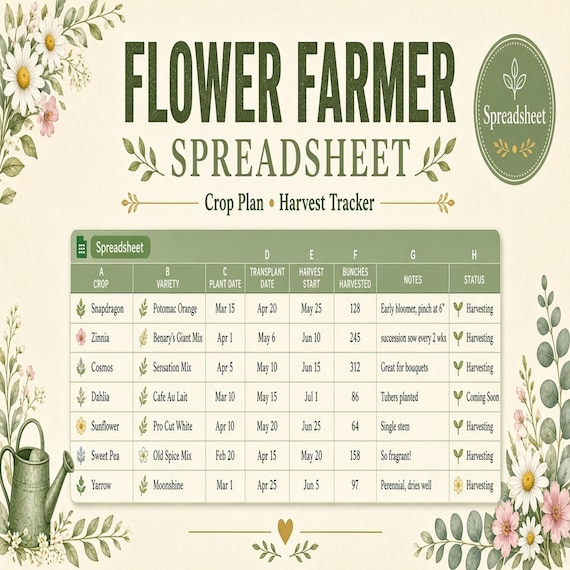
Flower Farm Planner Spreadsheet
The pages are designed to help you prepare, record decisions, and keep the next action visible without building your own system…

Florist Spreadsheet
Florist stem count spreadsheet for wedding and event florists: Excel-first workbook with stem inventory, wedding recipe cards…

Seed Packet Clipart PNG Bundle
A finished transparent PNG clipart bundle for garden planners, seed swap hosts, homestead shops, printable sellers, and botanical…