Small Business Templates · Jul 30, 2026 · 13 min read
Jewelry Craft Show Inventory Workflow: Tag SKUs, Count Stock, and Reconcile Sales
A practical workflow for connecting jewelry display tags, opening stock counts, event sales, backstock, and the final post-show inventory review.
Confirm that the missing piece is a connected jewelry inventory workflow
A jewelry seller can have attractive cards, a tidy display, and a payment app yet still finish a craft show unsure which pieces sold or how much stock is left. The missing connection is usually a stable path from each sellable item to its display tag, opening count, event movement, and closing count. This guide focuses on that path. It complements the separate earring-card stand guide, which covers the physical fit and placement of a printable rack rather than the records attached to the jewelry.
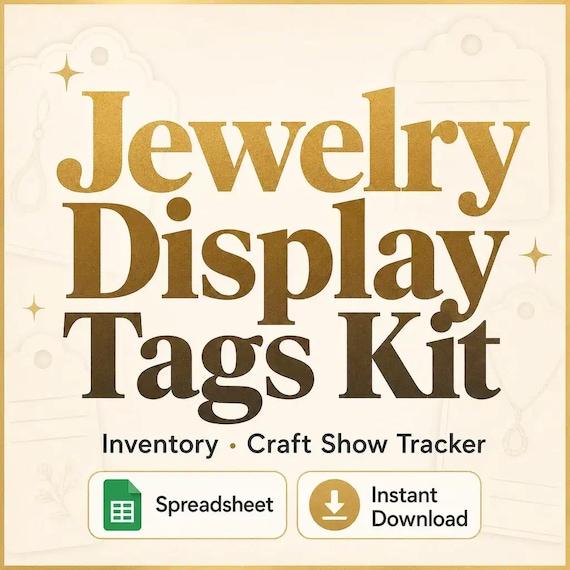
The featured SteadyStackStudio Jewelry Display Tags Kit is currently described as a ZIP download containing an Excel jewelry inventory and show-sales tracker, printable PDF display tags and count sheets, editable PPTX price and card templates, a quick-start PDF, and a README/license note. No physical tags, cards, jewelry, or display fixtures are shipped. That combination fits a seller who wants paper at the table and one digital record behind it. Before checkout, confirm the current previews, included files, software requirements, editing needs, and license against the devices and workflow you actually use.
- Choose this workflow when tags, stock counts, and event sales need to stay connected.
- Use a display-fixture guide when card dimensions, rack fit, or table placement is the main problem.
- Expect editable and printable files, not physical tags or an automatic point-of-sale system.
- Check the latest Etsy listing and previews before relying on any included-file detail.
Give every sellable variation one stable identifier
Start with the smallest unit a customer can buy. A necklace in two finishes, earrings in three colors, or two sizes of the same ring should not share an identifier if you need to know which variation left the table. Give each sellable variation one short internal code and keep that code stable across the workbook, tag, packing list, and event record. The code does not need to explain the entire product. It only needs to lead back to one unambiguous item record.
Build the code from details that are unlikely to change, such as an abbreviated collection, item type, variation, and sequence number. Keep the parts in the same order. Avoid using only the price, booth location, or a description such as “blue pair,” because those details can change or repeat. If an older item already has a code, preserve it rather than inventing a new one for every show. Retired codes should remain retired so a later sale cannot be matched to the wrong design. Before printing tags, scan the list for duplicates and for codes that are so similar they will be easy to mistype during a busy event.
- Assign one identifier to each variation that must be counted separately.
- Use a short, repeatable pattern rather than a full product description.
- Do not recycle a retired code for a different piece.
- Check for duplicates and look-alike codes before the first tag is printed.
Create the item record before designing the customer-facing tag
The inventory row is the private source of truth; the display tag is a customer-facing view of selected details. Create or review the item record first. At minimum, the record should let you identify the piece, variation, current selling price, opening quantity, and status. Add only fields you can maintain consistently. Collection, storage location, event destination, and a short distinguishing note may help, but an elaborate record that is never updated will be less useful than a smaller accurate one.
Keep factual product details separate from internal notes. Materials, dimensions, care statements, and other customer-facing descriptions should come from information you have verified for the actual jewelry. Do not copy a material claim from a similar piece or use a template as proof of metal content, safety, origin, or regulatory compliance. Cost and margin work can also live in a dedicated pricing file if that keeps sensitive numbers away from the show sheet. The display-tag kit is described as an organization tool, not accounting, tax, product-safety, or jewelry-material compliance guidance.
- Make the digital item record before formatting its printed tag.
- Keep enough detail to distinguish the exact variation being counted.
- Use verified product information for all customer-facing claims.
- Separate sensitive costing notes from the paper used at the booth.
Count opening stock by item and location
An opening count should describe what is physically going to the event, not every piece the business owns. Count the display quantity and packed backstock for each identifier, then add them to produce the event opening quantity. If finished stock remains at home, in another shop, or reserved for an order, keep it outside the event total and label its location separately. This prevents a piece that never traveled to the show from appearing to be missing when the event closes.
Count from the physical jewelry toward the record, not only from yesterday’s spreadsheet. Work one tray, case, or collection at a time. Place a temporary marker on a completed container so it is not counted again, and resolve any difference before the case is closed. Record the count date, event name, and who completed it if more than one person packs. For one-of-a-kind pieces, the opening number may be one; for repeated designs, it may be several. The method remains the same: every item at the event belongs to one code, one location, and one opening quantity.
- Separate table stock, packed backstock, reserved pieces, and stock staying elsewhere.
- Count the physical pieces into the event record before packing is complete.
- Mark completed trays or cases so they are not counted twice.
- Resolve packing differences before the opening quantity is treated as final.
Design each display tag for two quick readings
A useful tag should work for the customer from normal viewing distance and for the seller during a stock check. Give the customer the clearest information first: a readable product or collection name and the current price. Add a verified material, size, or care note only when it helps the purchase decision and fits comfortably. Place the internal identifier in a consistent, less prominent position where the seller can find it without turning several cards over or guessing which line is the code.
Do not force the full inventory row onto a small card. Crowded type defeats the purpose of a tag, and a booth card is not automatically a complete product label for every location or jewelry type. Test the hierarchy with a sample at actual size. Someone should be able to answer “what is this?” and “what does it cost?” quickly, while the person running the booth can answer “which item record is this?” without relying on memory. If a design has several variations on one fixture, make the variation and code relationship especially clear so a sale is not recorded against the wrong finish, size, or style.
- Lead with a readable item or collection name and current price.
- Print the stable identifier in the same location on every tag.
- Include only verified customer-facing details that remain legible.
- Keep private costs, supplier notes, and unrelated workbook fields off the display card.
Print one proof and test it in the real display
Edit one representative card in the PPTX template and print a single proof before producing the full set. Use the paper, printer, scaling, and cutting method intended for the show. Check the final card dimensions, margins, contrast, price readability, and whether the internal code remains easy to find. Then place the proof in the actual holder or beside the actual piece. A tag that looks balanced on a monitor can be clipped by a cutter, hidden by jewelry, or too small to read once it is on a crowded table.
- Print at actual size with the intended paper and printer settings.
- Test the tag with the real jewelry and holder, not on a screen alone.
- Check cutting, holes, clips, price visibility, and code placement.
- Save one approved proof or version reference before batch printing.
Pack from the opening count and keep backstock findable
Use the completed opening count as a packing control. Group finished pieces in a way the booth team can maintain, such as by collection, item type, or identifier range. Label the outside of each backstock container with a short location name that also appears in the working record. The goal is not a perfect warehouse system. It is to let someone find the replacement for a sold display piece without opening every pouch while a customer waits.
Keep tags paired with the correct items. If tags travel separately to prevent bending, bundle or label them by the same sequence used for the jewelry. Bring a small set of approved replacement cards only if you can control which version is current; a blank handwritten card should not quietly introduce a different price or an unverified product statement. Before departure, compare the number of packed containers with the packing note, confirm that reserved or online-order pieces are not mixed into event stock, and protect the digital working copy so an accidental edit does not erase the opening record.
- Use container labels that match locations in the event record.
- Keep spare tags grouped by the same item sequence as the jewelry.
- Separate reserved pieces and other-channel orders before leaving.
- Protect the final opening count from accidental changes during the show.
Record every movement with the same small set of event labels
During the show, record the movement that changes available event stock. A simple sale entry normally needs the item identifier, quantity, and enough event context to connect it to the correct show. If the tracker provides additional fields, use only the ones the booth team can complete reliably. Payment processing should remain in the approved payment system; there is no need to copy card numbers or other sensitive payment details into an inventory workbook.
Not every piece that leaves its starting position is a completed sale. Agree on a short set of labels before opening: sold, held, moved to backstock, damaged, sample, or returned to display, for example. Use labels that match the real booth routine and do not create more choices than the team can remember. When a display piece sells and an identical item replaces it, record the sale once; moving its replacement from a case to the table is a location change, not a second sale. If the booth becomes too busy for immediate entry, place the sold tag or a coded slip in one controlled capture point and update the record at the next quiet moment.
- Capture the identifier and quantity for each completed sale.
- Use a small, agreed set of labels for non-sale movements.
- Do not count a backstock-to-display move as another sale.
- Use one temporary capture method when live entry is not practical.
Make discounts, sets, holds, and damaged pieces visible
Exceptions cause most end-of-show confusion because the piece moved but the ordinary sale routine did not apply. If an item is discounted, record the item and the actual selling price in the appropriate sales record rather than changing its standard price everywhere. If several coded pieces are sold as a set, reduce each component that physically left the booth. If a customer hold is allowed, label the piece and its status clearly, then either complete the sale or return it to available stock using the same identifier.
Damaged, lost, sampled, or gifted pieces should not be disguised as sales. Remove them from sellable event stock with a truthful reason and keep any needed follow-up outside the customer-facing tag. Returns and exchanges need both sides recorded: the piece coming back and the piece leaving. Decide how these situations are handled before the show within the business’s own policies and applicable requirements. A template can make the movement visible, but it cannot establish a return policy, authorize a discount, calculate taxes, settle a payment dispute, or decide whether a piece remains safe and suitable to sell.
- Record the actual sale outcome without overwriting the normal item identity.
- Reduce every component when a set contains several separately coded pieces.
- Use explicit reasons for damage, loss, samples, or gifts.
- Record both the incoming and outgoing items in a return or exchange.
Close the show with a physical count and a simple reconciliation
Do not declare the inventory finished when the doors close. Count what remains on the display and in backstock before the containers are merged with stock from another location. For each item, compare opening quantity minus recorded sales and other recorded removals with the physical closing quantity. When the two numbers match, the event record has a clean closing point. When they do not, label the difference as unresolved while the event is still fresh instead of forcing the spreadsheet to match the expected number.
Investigate in a consistent order: temporary sale slips, holds, exchanges, damaged pieces, display samples, items moved between containers, duplicate entries, and simple counting errors. Recount the physical piece before changing a record. Note the explanation when one is found and preserve both the original and corrected context. A variance does not automatically prove theft, a missed payment, or staff error; it means the recorded movement and the physical count do not yet agree. Keep payment settlement and formal bookkeeping in their proper systems, and obtain qualified accounting or tax guidance for financial treatment beyond the event inventory record.
- Count display stock and backstock before mixing in inventory from elsewhere.
- Compare opening stock, recorded movements, and the physical closing count.
- Recount and review temporary records before editing the expected result.
- Leave an unexplained difference visible rather than inventing a sale or count.
Use the completed event record to plan one practical next action
After the closing quantities are reliable, review the event by item and collection. Look for pieces that sold out early, items that sold while backstock remained, products that were repeatedly handled but not sold, and tags that caused questions. Those observations can guide one next action: replenish a specific variation, print a clearer tag, change a backstock location, retire an obsolete code, or bring a different quantity next time. Do not treat one event as a universal forecast. Venue, weather, audience, price changes, placement, and event length can all affect the result.
Keep sales evidence separate from speculation. A zero does not explain why an item did not sell, and a strong result does not guarantee the same outcome at the next market. Write short notes only when the booth team observed something useful, such as customers confusing two variation names or a tag being hidden behind a display. If pricing or margin is the next problem, move to the dedicated handmade pricing calculator rather than adding untested formulas to the show sheet. If the physical display is the problem, compare the existing earring rack, price-tag holder, riser, or market-fixture bundle instead of turning an inventory workbook into a layout planner.
- Base the review on reliable closing counts and recorded movements.
- Choose one restock, tag, storage, or display improvement for the next event.
- Treat observations from one show as context, not a guaranteed forecast.
- Use a dedicated pricing or display tool when that becomes the main task.
Archive the event without creating several competing inventory masters
Preserve an untouched copy of the original download, then use a clearly named working file. When the event is complete, label or archive its final count and sales record before opening the next event copy. Carry forward the confirmed closing quantities into the business’s chosen current inventory record, but do not keep several spreadsheets that all claim to be the live total. Decide which file is current, which files are event history, and who is responsible for updating the master after online, studio, retail, or market sales.
If more than one person handles stock, write down the handoff: which event is closed, which differences remain unresolved, what has been moved, and which quantity is ready to become the next opening count. Protect customer and business information according to its sensitivity, use access controls appropriate to the device or storage service, and retain records for the period that fits the business’s actual obligations. The template does not set privacy, bookkeeping, tax, insurance, or record-retention requirements. Its value is a clear chain from one item identifier to one event result and then to the next confirmed count.
- Keep an untouched original download and a separate working copy.
- Close and label one event record before preparing the next.
- Maintain one declared current inventory source rather than several live totals.
- Document the handoff when another person updates or stores the stock.
Choose the jewelry tag kit or the narrower tool that fits
Choose the featured Jewelry Display Tags Kit when the main job is connecting an Excel jewelry inventory and show-sales tracker with printable PDF display tags and count sheets and editable PPTX price or card templates. Review the current product page and Etsy listing to confirm the latest previews, files, license, and software fit. Skip it if you need shipped tags, physical jewelry fixtures, automatic stock synchronization, a point-of-sale subscription, custom setup, or legal, tax, safety, and material-compliance guidance.
- Use the jewelry kit for linked tags, counts, event stock, and show-sales records.
- Use the pricing or reseller spreadsheet when costing or listing preparation leads the task.
- Confirm the latest Etsy details before checkout and do not buy overlapping systems without a clear role for each.
Printables used in this guide
Instant downloads from the SteadyStackStudio Etsy shop.
Jewelry Display Tags Printable
Jewelry makers and craft-show sellers who need printable display tags and a practical inventory spreadsheet — without fake…
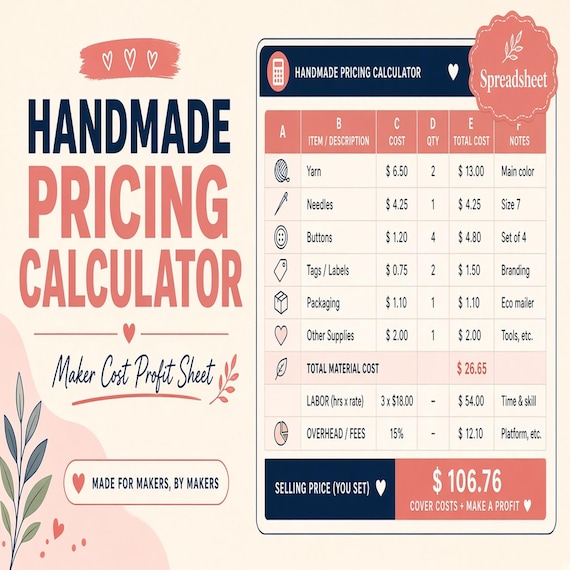
Handmade Pricing Calculator Spreadsheet
Handmade pricing calculator and craft inventory spreadsheet for sellers who need to price products, track material costs…
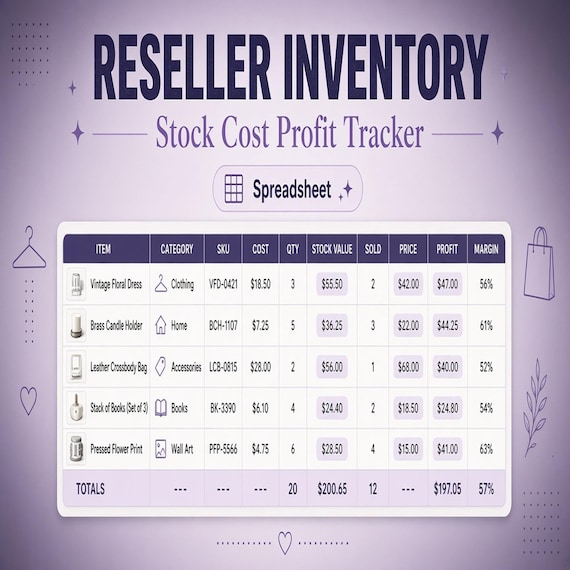
Reseller Inventory Spreadsheet
Reseller Inventory Spreadsheet with Thrift Reseller SKU Tracker, Cost and Profit Tracker, Listing Prep Checklist Excel PDF Word.
Pottery Studio Inventory Spreadsheet
This is a premium digital template kit for ceramic artists, pottery studios, market potters, small-batch makers, and class-based…