Small Business Templates · Jul 21, 2026 · 15 min read
Estate Sale Tagging Workflow: Inventory, Pricing, Sold/Hold Status, and Pickup
A practical estate sale setup for assigning item references, preparing readable price labels, defining sold and hold steps, recording pickup details, and reconciling the inventory tracker without relying on memory at checkout.
Confirm the files in the current estate sale kit
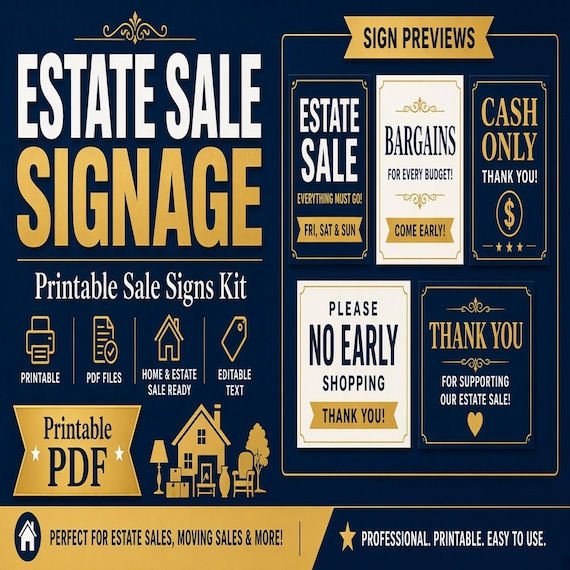
Begin with the downloaded package rather than a listing screenshot or an assumed estate sale system. The current SteadyStackStudio kit describes an Excel inventory and payout tracker, printable tags and signage in PDF format, editable signs and tags in PPTX format, a quick-start PDF, and a README with the license note. It arrives as a digital ZIP download; printed signs, adhesive supplies, display stands, pricing services, and on-site sale help are not included.
Open the quick-start PDF first, then make one untouched backup of the ZIP and one clean extracted master folder. Confirm that the XLSX, PDF, PPTX, quick-start guide, and README all open in the software you intend to use. Work from duplicates when entering sale information or changing a sign. If a format, field, or layout that matters to the event is unclear, settle that question before inventory day rather than building the sale around an unverified assumption.
- Keep the original ZIP and one unedited extracted copy.
- Verify the XLSX, PDF, PPTX, quick-start PDF, and README before setup begins.
- Use working copies for sale-specific names, prices, and status changes.
- Remember that this is a digital template kit, not a physical sign package or appraisal service.
Choose one inventory record as the control point
A tag can fall off, a hold note can be moved, and a verbal promise can be forgotten. Choose one working inventory file as the place where the current item status is confirmed. The included Excel tracker is the natural starting point, but review its actual columns before entering data. Add or adapt working fields only when your software and process support them. Useful details may include a unique item reference, short description, room or zone, approved price, current status, and a note that points to any pickup or payout record.
Not every suggested detail is necessarily prebuilt, and a template cannot decide which records your business, client, or family must keep. Define the minimum information needed to identify an item without ambiguity, then apply that rule consistently. Limit personal information to what is genuinely needed, protect the working file from casual access, and follow the sale company's own record-retention and privacy practices. The goal is a dependable operational record, not a substitute for legal, tax, appraisal, or estate-administration advice.
- Use one controlled workbook rather than several competing lists.
- Give every tracked item a unique reference that also appears on its tag or slip.
- Record only information the team can verify and maintain.
- Keep sensitive customer, family, and payout details out of public-facing signs.
Define available, hold, sold, and pickup states before the doors open
Write down what each status means for this sale. Available should mean the item can be purchased now. Hold should identify an approved temporary reservation under the sale's stated policy. Sold should mean the team has completed the step it requires before an item leaves active inventory. Pickup should identify a sold item that remains on site until an arranged collection. If the business uses other terms, define them just as plainly and avoid two labels that appear to mean the same thing.
Decide who may change a status, where the change is recorded first, and which physical tag replaces the price label. Also decide how an expired hold returns to available inventory and how a canceled transaction is handled. These decisions belong to the sale organizer and must match current business policies and local requirements. A printable sold or hold tag communicates a decision; it does not create the policy or prove that every required payment, authorization, or release step has been completed.
- Define every status in one short sentence the whole team can repeat.
- Name the person or role allowed to approve each status change.
- Choose the record and physical tag that must change together.
- Set a clear procedure for expired holds, canceled sales, and returned items.
Inventory room by room with a repeatable item reference
Work through one room, table, shelf, or zone at a time. Assign the item reference before printing or attaching its price label, then enter a description that another team member can recognize without seeing your memory of the item. Distinguish similar objects with a practical feature such as color, material, size, maker mark, or location when that feature is known and useful. Avoid unsupported claims about age, origin, condition, authenticity, or value.
Use the same reference structure throughout the event. A room code plus a sequence number can be easier to sort than unrelated handwritten numbers, but the exact structure matters less than uniqueness and consistency. If several pieces sell only as one lot, decide whether the lot receives one reference or whether every piece needs its own record. Photographing or documenting items may be useful in some workflows, but follow the owner's permission, the organizer's policy, and appropriate privacy practices before doing so.
- Finish one defined zone before starting the next.
- Make each description specific enough for a second person to identify the item.
- Use one reference format and check for duplicates as you go.
- Decide how sets and lots will be tracked before their tags are printed.
Separate pricing decisions from tag production
Treat the approved price as source information, not as something the person editing the label should invent. Record the price only after the responsible organizer, owner, or qualified specialist has made the decision under the sale's process. The template can display and track a number, but it cannot appraise an item, establish ownership, calculate tax obligations, or determine what may legally be sold. Flag uncertain items for review instead of guessing so the tagging line can keep moving.
Run a short approval pass before producing a batch of labels. Compare the item reference, description, and price in the working record, then mark that row ready for tag production using whatever method the team can maintain. If the sale uses planned discounts or later price changes, document the organizer's rule separately and avoid printing a promise that may not apply to every item. Clear separation between approval and production reduces accidental price changes during formatting.
- Enter prices from an approved source rather than estimating while editing tags.
- Route uncertain ownership, condition, origin, or value questions back to the responsible person.
- Check reference, description, and price together before a tag is marked ready.
- Keep discount and price-change rules under the organizer's control.
Use the PDF or PPTX according to the job
Use the printable PDF when the supplied layout already fits the sale and you want a stable print path. Use a duplicate of the PPTX when the editable signs or tags need the sale name, approved wording, color changes, or another supported adjustment. Keep one blank PPTX master and create a clearly named working copy for the event. Do not overwrite the only source while experimenting with type, spacing, or page setup.
When editing, preserve a simple reading order: item reference, brief description if needed, and approved price or status. The exact fields depend on the chosen template and sale process. Test the longest realistic item reference and price before duplicating the layout. If the text no longer fits, shorten nonessential wording or choose a more suitable supplied layout instead of shrinking everything until it works only when viewed up close. Reopen the exported file or print preview to catch font substitution and shifted line breaks.
- Choose the PDF for the supplied printable layout and the PPTX for supported edits.
- Keep a blank master separate from the event-specific working file.
- Build the layout around the longest realistic reference and price.
- Review exported pages for changed fonts, line breaks, margins, and clipping.
Print one demanding proof and test it in the sale space
Do not print a full stack first. Choose a tag or sign with the longest realistic text, print one proof on the intended paper, and check the actual dimensions. Confirm that the printer used the correct paper size, orientation, scale, tray, and one-sided or two-sided setting. Inspect every edge for clipping and make sure handwritten or typed entries have enough room. Follow the printer and paper manufacturers' current instructions rather than forcing an unsupported material through the machine.
Place the proof where a customer or team member will read it. Check the item reference and price from the expected distance, under the real lighting, and beside the colors and patterns in the room. A tag with good contrast on a desk may disappear against a dark cabinet or a busy table covering. If the result fails, change one variable and print the same proof again. Record the successful file name, paper, scale, and printer setting before producing the batch.
- Proof the tag with the hardest realistic combination of text and numbers.
- Check size, scale, margins, clipping, and writing space on paper.
- Read the proof at the real viewing distance and under the event lighting.
- Save the approved print settings so later batches match.
Attach or place labels without confusing or damaging items
Choose the tag placement method according to the actual item, surface, owner instructions, and sale policy. A label should be easy to find and hard to swap, but it should not cover an important identifying mark, operating control, safety instruction, condition detail, or part customers need to inspect. Do not assume an adhesive, string, pin, clip, or marker is safe for every finish, fabric, paper object, or collectible.
When direct attachment is not appropriate, place the item with a nearby card or display label and make the item reference unmistakable. For a set or large object, keep the reference visible from the normal approach path and repeat it on any pickup paperwork. After tagging a zone, have a second person compare a sample of physical labels with the inventory record. That spot check can catch transposed numbers, duplicate references, missing labels, and tags placed beside the wrong object before customers arrive.
- Follow the owner's and organizer's approved placement method for each type of item.
- Keep labels clear of identifying marks, controls, warnings, and important condition details.
- Use an unambiguous nearby label when direct attachment is unsuitable.
- Spot-check physical tags against the workbook before opening.
Run holds as a timed, documented handoff
A hold works only when the customer, checkout team, and floor team understand the same rule. Display or explain the sale's approved hold terms, including any time limit, deposit or payment requirement, and what happens when the deadline passes. Do not invent those terms from this template. When a hold is approved, confirm the item reference, update the control record, place the hold tag, and move or mark the item according to the organizer's process.
Write only the minimum customer detail needed for the authorized handoff, and keep that information away from public view. A hold tag facing the room usually needs the status and item reference, not a phone number or full customer name. If a hold expires, have the authorized person remove the hold tag and return the record to available status in one controlled step. Avoid leaving a crossed-out tag beside the item, because a customer cannot tell which message is current.
- Use the sale's approved hold terms and communicate them consistently.
- Update the record and physical status marker as one action.
- Keep customer contact details off public-facing tags.
- Remove expired status markers completely when an item returns to available inventory.
Connect sold tags and pickup slips to the same item reference
When an item is sold but remains on site, the sold tag, control record, and pickup slip should all point to the same item reference. Follow the organizer's payment and release process before changing the status. Record only the details needed to distinguish the item and complete the authorized pickup, such as the reference, short description, approved collection information, and the record of whichever payment or release check the business requires. Do not place sensitive transaction details on a public tag.
Give the customer the appropriate copy or confirmation under the sale's process and keep the corresponding record where the pickup team can retrieve it. At collection, compare the item reference on the object, the pickup slip, and the control record before releasing the item. For large or fragile pieces, the organizer should separately define access, moving, loading, timing, and responsibility. The template organizes communication; it does not provide moving services, safety instructions, insurance, or a legal release.
- Repeat one item reference on the inventory row, sold tag, and pickup slip.
- Keep payment and personal details out of customer-facing status markers.
- Match all three records again before an item leaves the site.
- Use a separate approved plan for access, moving, loading, and fragile items.
Reconcile checkout without relying on the visible price tag alone
At checkout, read the item reference as well as the price. Confirm both against the current record or the sale's approved checkout source before completing the transaction. A handwritten correction, loose label, or tag that was moved from another object should trigger a review rather than an argument at the table. Name one person or escalation path for price questions so the checkout line does not create a different rule for every customer.
After the approved transaction step, update the control record and attach or place the sold or pickup marker immediately. If several people are checking out customers, avoid allowing each person to maintain a private paper list that is reconciled much later. Use the included payout tracker only after reviewing what it actually records, then follow the business's established financial, tax, and client-accounting procedures. The spreadsheet is an organizational aid and does not replace bookkeeping, tax, fiduciary, or legal advice.
- Confirm item reference and current price before completing the sale.
- Escalate mismatched, missing, or altered tags to the designated decision-maker.
- Change the digital record and physical status marker immediately after the approved transaction step.
- Reconcile payout information under the business's established accounting process.
Control markdowns and replacement tags from one approved list
Price changes become confusing when the workbook, printed tag, room sign, and checkout team all show different information. Record the approved change in the control file, create a replacement label, remove the outdated label, and tell checkout which version is current. Do not place a new sticker over the old price if the underlying number remains visible or the result could be peeled back and misread.
Use a revision note or timestamp in the working file if the team needs to understand when a price changed. If a category-wide discount is authorized, make the sign clear about the eligible items and effective period, then confirm how checkout will apply it. Avoid sweeping language when exceptions exist. At the end of the discount period, remove the sign and update any affected records together. A simple change log is more reliable than expecting each volunteer or family member to remember a verbal announcement.
- Start every price change with the authorized source record.
- Replace the old tag instead of layering contradictory prices.
- State discount scope and timing clearly when a category rule is used.
- Record revisions when the team needs an audit trail for the event.
Build a customer path with signs that each do one job
Use the printable or editable signs to answer the most important question at each point in the sale. An entrance sign can establish the event or main instructions. Room or category signs can help with navigation. A hold or pickup sign can explain where an approved process begins. Checkout signs can direct the line or identify the payment area. Keep each sign focused instead of placing every rule, price note, and pickup instruction on one crowded page.
Walk the space from the customer's point of view. Check whether a door blocks the sign, a crowd hides it, a window creates glare, or a sale item looks like part of the display. Keep exits, aisles, and required notices clear under the organizer's site plan and applicable requirements. The template supplies communication pieces, but it does not assess occupancy, accessibility, security, or emergency planning. Print only after the wording and placement have been approved for the actual location.
- Give the entrance, room, hold, pickup, and checkout signs distinct jobs.
- Use short instructions that remain readable in a moving crowd.
- Walk the real route and check doors, glare, sightlines, and visual competition.
- Keep business, site, accessibility, and safety requirements under the responsible organizer's review.
Close each day with a physical-to-digital status check
Before resetting the rooms, compare the physical sale space with the inventory record. Review held items, sold items awaiting pickup, completed pickups, unresolved tag questions, and items that returned to available status. Count or inspect one zone at a time so a mismatch has a limited search area. Do not erase a discrepancy just to make the totals look clean; note it and send it to the responsible person for review.
Collect stray tags and slips, remove personal information from public areas, and store active pickup records securely. Save a dated copy of the working workbook according to the business's backup and retention practices. If another day remains, print replacement tags from the approved source and brief the next team on open holds, pickups, and price decisions. A ten-minute controlled handoff can prevent the morning shift from reopening items that are already sold or honoring a hold that has expired.
- Review holds, sold items, pickups, exceptions, and available stock by zone.
- Preserve unresolved differences for review instead of silently overwriting them.
- Secure records that contain customer or payout information.
- Give the next shift a short written handoff based on the current control file.
Archive the sale without overwriting the reusable master
After the event, keep the blank templates separate from the completed sale records. Name the archive with the event and date, then include the final working workbook, approved sign files, print notes, and any change log the organizer is required or permitted to retain. Remove duplicate drafts that contain unnecessary personal information and follow the business's retention and deletion policy. A reusable template master should not carry names, phone numbers, prices, or payout details from the previous sale.
Review the workflow while the event is still fresh. Note which item references were easy to read, where tags were frequently lost, which signs reduced questions, and which status handoffs created confusion. Update a clean process note rather than silently changing the original download. Reopen the current README before reusing, sharing, or adapting the files for another organization. The listing's current files and license note remain the authority for permitted use; do not redistribute or resell the original template files as another download.
- Store the completed event record apart from the blank reusable master.
- Retain or delete customer and payout information under the business's policy.
- Write process lessons into a clean note for the next authorized event.
- Keep the original files private and follow the current README for future use.
Decide whether this estate sale kit fits the job
The featured estate sale kit fits a workflow that needs an Excel inventory and payout tracker, printable PDF price, sold, and hold materials, editable PPTX signs or tags, pickup slips, and a quick-start guide in one digital package. It is most useful when the organizer is prepared to define status rules, assign item references, approve prices, protect customer information, print a physical proof, and keep the workbook synchronized with the sale floor. Confirm the current Etsy previews, included files, software fit, and license note before purchase.
Choose a different existing tool when the task itself is different. The reseller inventory spreadsheet centers on thrift SKUs and listing preparation. The jewelry display kit centers on booth tags, stock, and show-day sales. The handmade and product pricing spreadsheets center on costing and margin work, while the soap-and-candle business bundle is organized around maker records and labels. Those are neighboring inventory tasks, not replacements for appraisal, estate administration, live point-of-sale software, physical signage, staffing, or professional advice. Select the file set that matches the record you actually need to maintain.
- Choose the estate kit for connected inventory, sale tags, status signs, pickup slips, and payout organization.
- Skip it when the main need is appraisal, legal administration, live checkout software, staffing, or shipped signs.
- Compare adjacent downloads by the workflow they support rather than by file count alone.
- Verify the current contents, software requirements, digital-only delivery, and usage terms before checkout.
Printables used in this guide
Instant downloads from the SteadyStackStudio Etsy shop.
Estate Sale Signs and Price Tags Printable
Estate Sale Signs and Price Tags Printable with Sold Hold Tags, Room Signs, Sale Inventory Tracker, Garage Sale Kit PDF Word…
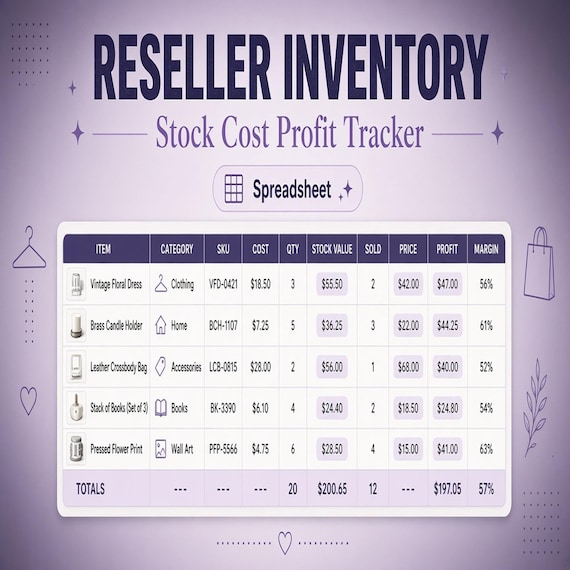
Reseller Inventory Spreadsheet
Reseller Inventory Spreadsheet with Thrift Reseller SKU Tracker, Cost and Profit Tracker, Listing Prep Checklist Excel PDF Word.
Jewelry Display Tags Printable
Jewelry makers and craft-show sellers who need printable display tags and a practical inventory spreadsheet — without fake…
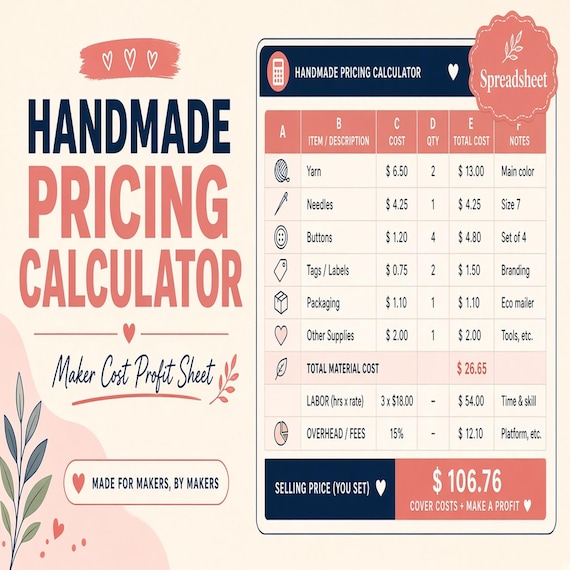
Handmade Pricing Calculator Spreadsheet
Handmade pricing calculator and craft inventory spreadsheet for sellers who need to price products, track material costs…